Me and false lashes have never been friends. I’ve had a couple of semi-successful attempts in the past but most ended up hanging off by the end of the night, giving me unhinged aunt vibes. My most traumatic strip lash experience was before a night out in Las Vegas, when I held a vial of glue between my teeth while trying to get the lid off and spilled it in my mouth. Who doesn’t want to spend a Saturday night in Vegas gargling away glue?
I was scrolling through Instagram recently when I passed a video of Margot Robbie and Jodie Comer’s go-to makeup artist, Pati Dubroff. She appeared to be applying false lashes underneath her natural lashes rather than on top of them. Huh? I scrolled back to watch again as she placed a small cluster of lashes underneath her own, using a special tool and the flick of a wrist. Scanning Pati’s caption, I found the handle for @Lashify, an American at-home lash extension system whose bio reads: “#Mascara? Don’t know him.”
@janellemyh TAKE HOME LASH EXTENSIONS WTF! Saw them on Tik Tok and *added to cart* STRAIGHT AWAY! @lashify #lashextensions #lash #eyelashes ♬ original sound – Janelle Han
I was officially intrigued and over the coming weeks I started seeing Lashify everywhere. Google searches for the brand are up 60% just this month, while the hashtag #lashify has an enormous 63.4 million views on TikTok. Was it just the algorithm, or was every makeup artist, influencer and TikToker suddenly jumping on this seemingly easy-peasy, upside-down lash trend? The lash flip was born and after what felt like forever, Lashify finally arrived in the UK in December 2021. The digital excitement was palpable but were the gorgeous, fluttery results I was seeing simply down to the smoke and mirrors of social media? There was only one way to find out…
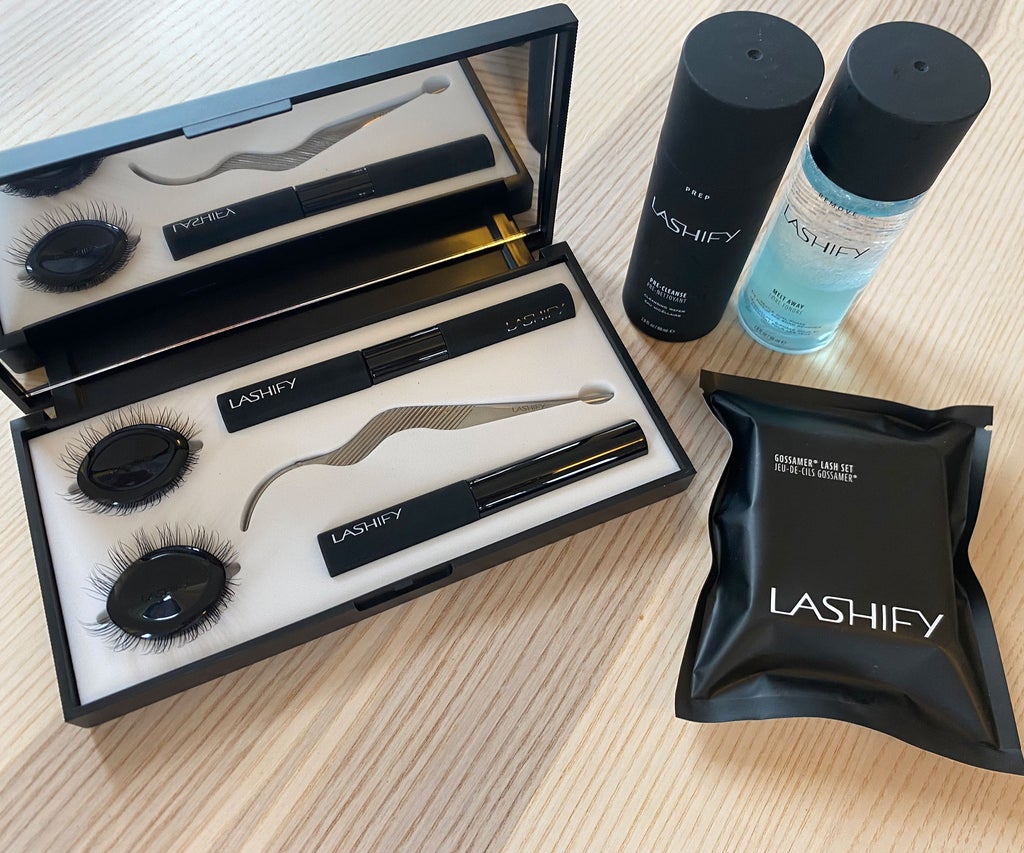
The Lashify Control Kit is by no means cheap at £130 but it comes with everything you need to get started. First up, the Fuse Control Wand. This looks like a long pair of tweezers and you use it to apply the lashes and to seal them at the end. Then there are the Wandoms (yep, they actually called them that). Wandoms are essentially silicone guards that you pop on the ends of your wand for added grip. The lash adhesive (or Whisper Light Dual-Sided Bond) is dual-ended. One end has a micro-mascara to swipe on a layer of black bond, while the other has a precision tip to apply a line of glue along the underside of the lashes where you fix the spine of your gossamer lashes (basically very fine, natural-looking falsies). You get to choose two cartridges of lashes for your Control Kit from the three core collection styles: Amplify (the most natural), Bold (more volume) or Curl (extra flutter). Then there are two lengths to pick from: 12mm and 14mm. Lastly, there’s the Night Bond Sealer, which reinforces the finished lashes and protects them for a longer hold.
@hanihanss Don’t know who needs to hear this but you NEED this kit 🤍 #diylashes #lashify #foryou ♬ SZAS VERSE KISS ME MORE – SZA FAN PAGE!
I went for full drama with C14 (yolo). In hindsight, I should have taken a more considered approach, using a selection of lengths and going shorter at the inner corner of the eye, then longer at the outer corner for a more natural, doe-eyed finish. But TikTok is awash with Lashify-obsessed beauty enthusiasts who prove that there are so many different styles you can achieve, from natural (concentrating lashes to the outer corner for a fluttery but believable finish) to all-out.
How do you apply Lashify lashes?
Luckily for me, Lashify is more than happy to baby you through the process, with endless tutorials on its website led by enthusiastic brand ambassadors. You can find a Level 1 tutorial here, but here’s the step-by-step I took.
Firstly, prep. This step is all about getting rid of any oils, dirt or makeup that may be sitting on your lashes, because anything oil-based will disrupt the Lashify bond. Lashify Pre-Cleanse Gossamer Lash Prep, £24, is a Japanese cleansing water sold separately (I dipped a clean spoolie brush into it and whipped it through my lashes) but a good shower will do the trick. Just keep any oil-based products away from your face and make sure your lashes are 100% dry before you begin.

The next step is creating the bond. Run the black, micro-mascara end of the Whisper Light Dual-Sided Bond through your natural lashes — we’re talking six to eight swipes to coat them all. This gives them that magnetic quality for the gossamer lashes to attach to. Once it’s nice and tacky on your lashes (place the back of your finger against the lash to check for stickiness), dab your line of glue about two millimetres above your waterline using the precision tip end (any closer and moisture could disrupt the glue).
The penultimate step is application. Using the tweezers, hold the lashes as close to the tips as possible. It’s up to you where you start — the inner corner just felt right for me. Stare down into your mirror and hold the tweezers like a pencil (thumb closest to your face), resting the spine of the lash along the glue line and scooping it up slightly until it sits snugly against the underside of your own lashes. Place your second set of lashes next to the first so that their spines are ‘kissing’ (no overlapping or gaps) and repeat until you reach the outer corner of your eye. The glue doesn’t dry too fast so there’s plenty of room for error. Not happy with the angle of your last lash? Go in and adjust it — no extra bond needed.
Once you’re happy with your lashes, wait a few minutes (if the bond is still wet, the lashes will move around when you try to fuse). Apply pressure along the lash spines, using the tweezer wand’s tip to pinch and seal everything in place. Finish by giving your lashes a quick coat of Night Bond Sealer to repel any water, dirt or oil. This enables them to last as long as possible.


Is Lashify good?
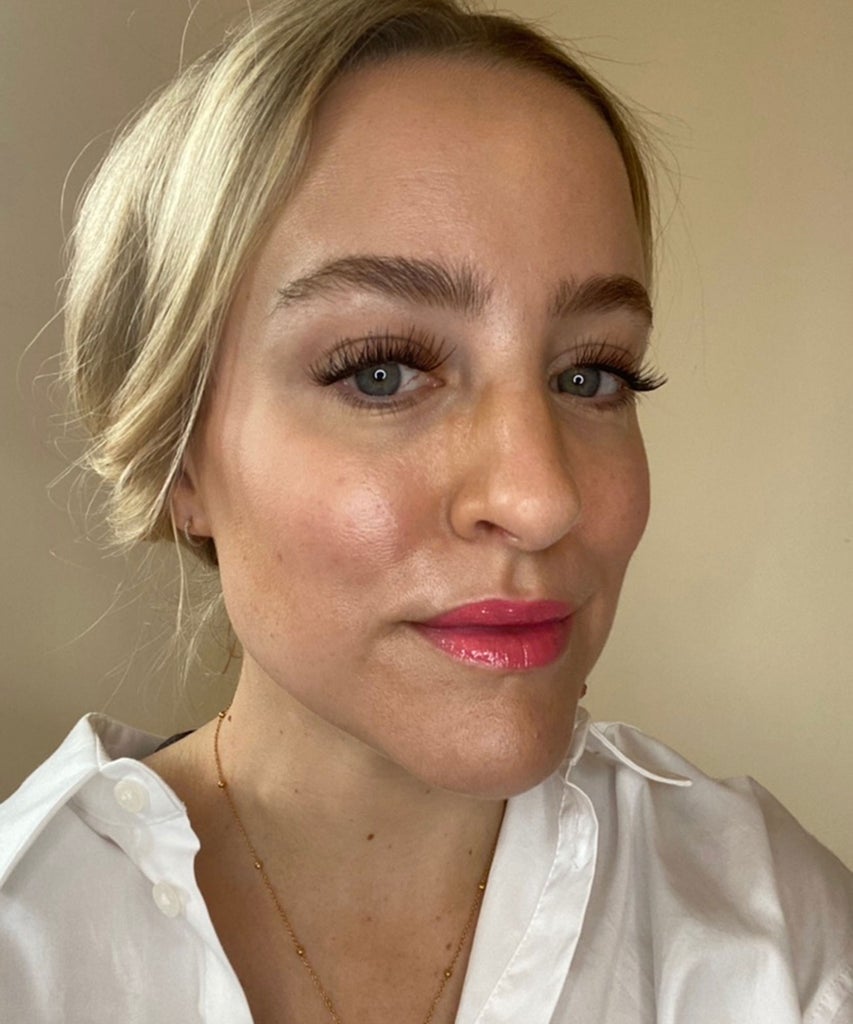
Lashify is a game-changer for anyone who can’t get to grips with strip lashes but loves that enhanced lash look. It’s a bit of a stretch to refer to them as lash extensions, considering the maximum you can expect them to last is a week (compared to in-salon extensions, which last up to six weeks and require regular appointments). Overall, I’d say the results look just as good.
I can honestly say that using Lashify was about 90% easier than applying strip lashes or those fiddly individual lashes that professional makeup artists love to use. These pictures are literally during and after my first ever attempt and I only watched one tutorial before starting, so I’ll let you be the judge…
How long does Lashify last?
By day three my lashes still looked amazing but I was starting to feel them loosen and was ready to take them off and faceplant my pillow again. Lashify claims that, with the right care, its lashes can stay on for up to a week and can also be reworn a few more times if stored carefully.
I’d say with a bit more practice, it’s sayonara, mascara.
Refinery29’s selection is purely editorial and independently chosen – we only feature items we love! As part of our business model we do work with affiliates; if you directly purchase something from a link on this article, we may earn a small amount of commission. Transparency is important to us at Refinery29, if you have any questions please reach out to us.
Like what you see? How about some more R29 goodness, right here?
I’m A Beauty Editor & This £11.99 Mascara Is Best