Asking “what’s for dessert?” is more than a nightly routine; it’s a personal exercise. It prompts me to imagine all the ways I can bestow myself and those around me with (edible) pleasures and comforts. Conceiving an answer and bringing it to life are acts of self-care and care for others. During the pandemic, when many of our normal sources of enjoyment disappeared, the question took on new import. I found myself at home thinking of new and creative ways I could add a little sweetness to daily life — literally.
This collection of desserts feels classic to me. That sense is a reflection of my family history, my childhood growing up in the Midwest, my culinary education in Paris, and my time living in New York City. Though what constitutes a “classic” differs for everyone according to age, geography, and life experience, I think you’ll find desserts here that give you a taste of the comforting and familiar, too.
This book is my love letter to dessert. Writing it taught me more than I imagined possible about the fascinating and delicious realm of sweet flavours and deepened my appreciation and admiration for the process of creating them. Though I originally embarked on writing this cookbook to expand my own horizons and become a more well-rounded dessert person, it quickly became a vehicle for providing my fellow dessert people with a wide variety of approachable recipes. As dessert people, we share the recognition that food is about pleasure rather than guilt, sociability rather than snobbery, and inclusivity rather than exclusivity. Whether you’re a fruit dessert person or a chocolate dessert person, a frozen dessert person or a baked dessert person, this book answers your burning question: What’s for dessert?
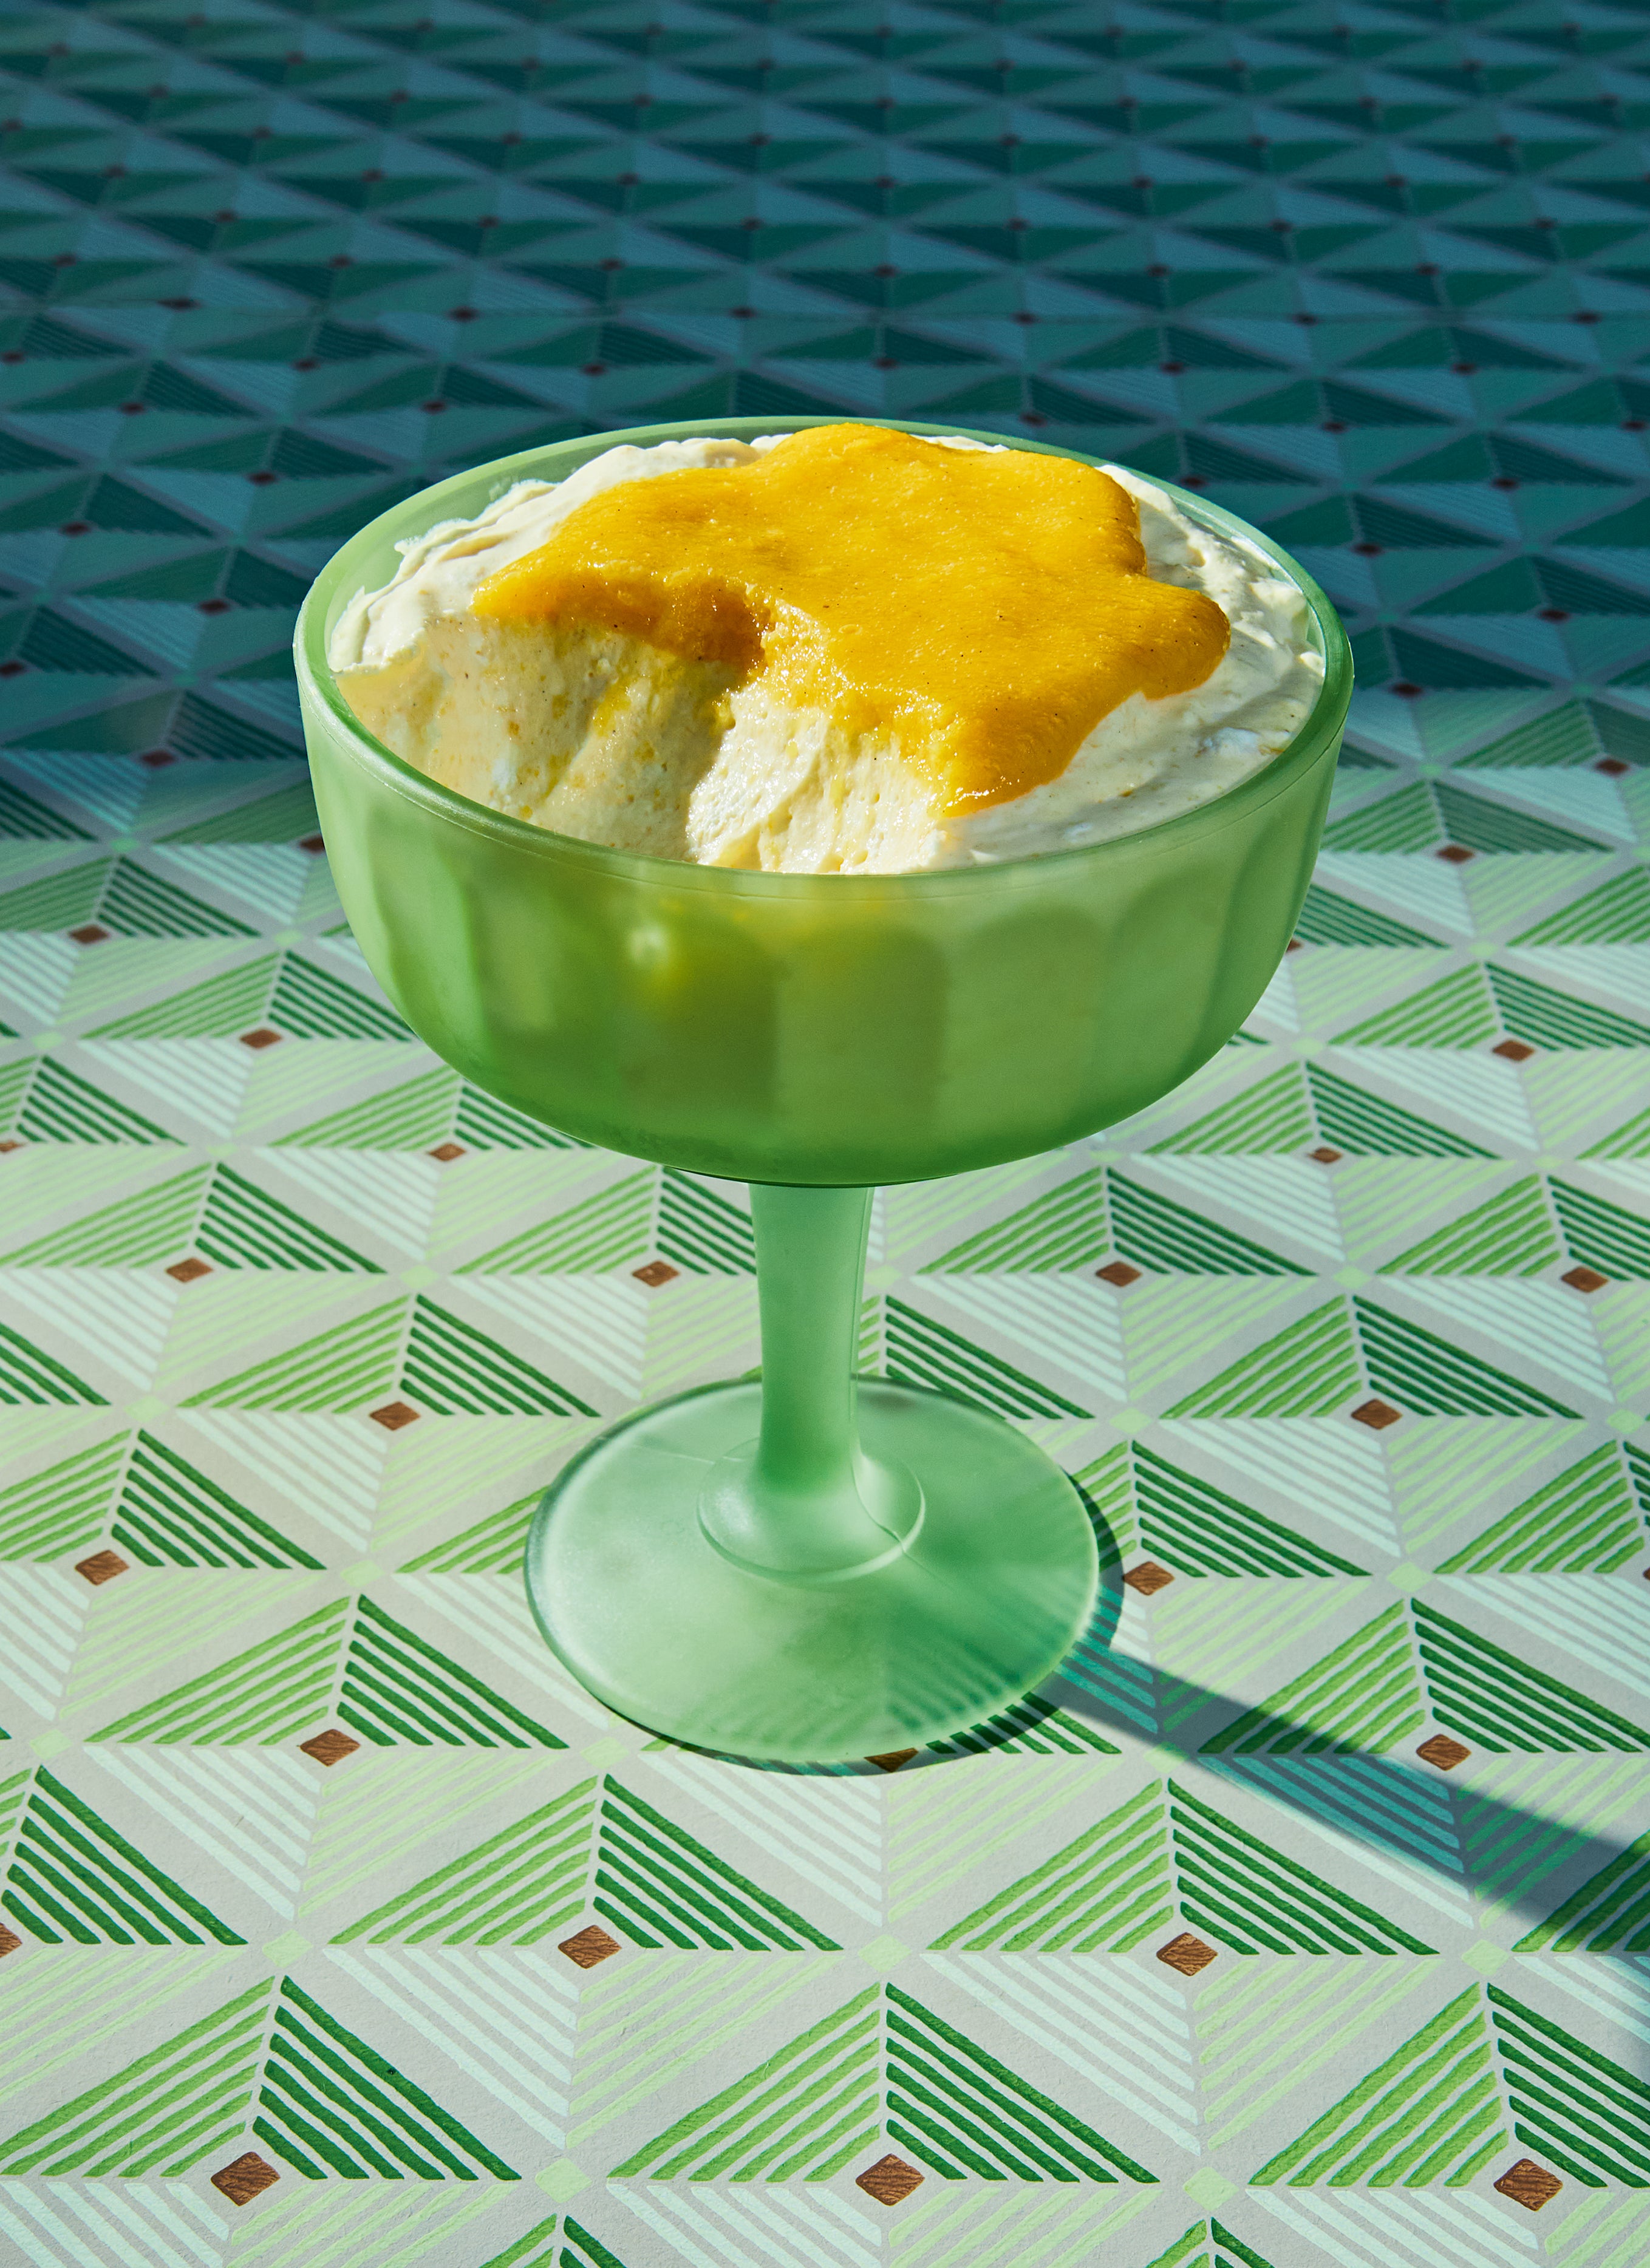
Mango-Yoghurt Mousse
Serves 8
Difficulty: 3 (Moderate)
Gluten-free
Active time: 45 minutes
Total time: 4 hours 45 minutes (includes 4 hours for chilling)
Special equipment: Blender (handheld or standard), hand mixer, 8 serving glasses
Ingredients:
— 2 teaspoons unflavoured gelatin powder
— 4 large egg yolks (2.1 oz / 60g)
— ¾ cup sugar (5.3 oz / 150g)
— ½ cup fresh orange juice (4 oz / 113g), from about 1 large orange
— 3 tablespoons fresh lemon juice
— ½ teaspoon ground cardamom
— ½ teaspoon kosher salt or ¼ teaspoon table salt
— 1 pound (454g) frozen mango chunks (about 4 cups)
— ½ cup plain whole-milk Greek yoghurt (4.2 oz / 120g)
— 2 cups heavy cream (16 oz / 480g), chilled
Method:
1. SOFTEN THE GELATIN: Place 3 tablespoons (1.5 oz / 43g) cold tap water in a small shallow bowl and sprinkle the gelatin evenly over the top (do not stir). Set the bowl aside to allow the gelatin to soften, 5 to 10 minutes.
2. MEANWHILE, ASSEMBLE THE CURD: In a small saucepan, combine the yolks and sugar and whisk vigorously, making sure no unincorporated sugar is trapped around the sides, until the mixture is pale and thick, about 2 minutes. Stream in the orange and lemon juices, whisking constantly and scraping around the sides, until the mixture is smooth. Whisk in the cardamom and salt.
3. COOK THE CURD: Place the saucepan over medium-low heat and cook, whisking constantly, until the foam has subsided and the curd barely holds the marks of the whisk and is thick enough to coat the back of a spoon, about 5 minutes. Immediately remove the saucepan from the heat and scrape in the softened gelatin, which will have solidified. Whisk briskly for about 30 seconds to dissolve the gelatin.
4. ADD THE MANGO AND BLEND: Add the frozen mango directly to the saucepan with the curd and stir to combine. Set the saucepan aside until the mango is mostly thawed and the curd is cold, about 5 minutes. Use a handheld blender to blend the mixture until it’s completely smooth. (Alternatively, transfer the mixture to a standard blender and blend on high.) Measure out 1 cup of the mango curd and set it aside at room temperature.
5. WHISK IN THE YOGHURT: Whisk the yoghurt into the remaining curd in the saucepan until smooth. Set the saucepan aside.
6. WHIP THE CREAM: In a large bowl, with a hand mixer, beat the cream on low speed to start and gradually increase the speed to medium-high as it thickens, until you have a firmly whipped cream that holds a stiff peak.
7. MAKE THE MOUSSE: Scrape the curd/yoghurt mixture into the bowl with the whipped cream and fold gently with a flexible spatula until combined and just a few streaks remain.
8. PORTION AND CHILL: Dividing evenly, spoon the mixture into eight serving glasses. Tap the glasses gently on the counter to help the mousse settle, then top each with about 2 tablespoons of the reserved curd. Cover the glasses and refrigerate until the mousse is cold and set, at least 4 hours.
Can I . . .
Make it ahead? Yes. The mousse can be covered and refrigerated for up to 3 days.
Halve the recipe? Yes. Halve all of the above ingredient quantities and follow the recipe as written. Keep in mind that because you will only be making half as much curd, it will cook more quickly in the saucepan. Divide the mousse and curd among four serving glasses.
Use a stand mixer instead of a hand mixer? Yes. Whip the cream in a stand mixer fitted with the whisk attachment and proceed with the recipe as written.
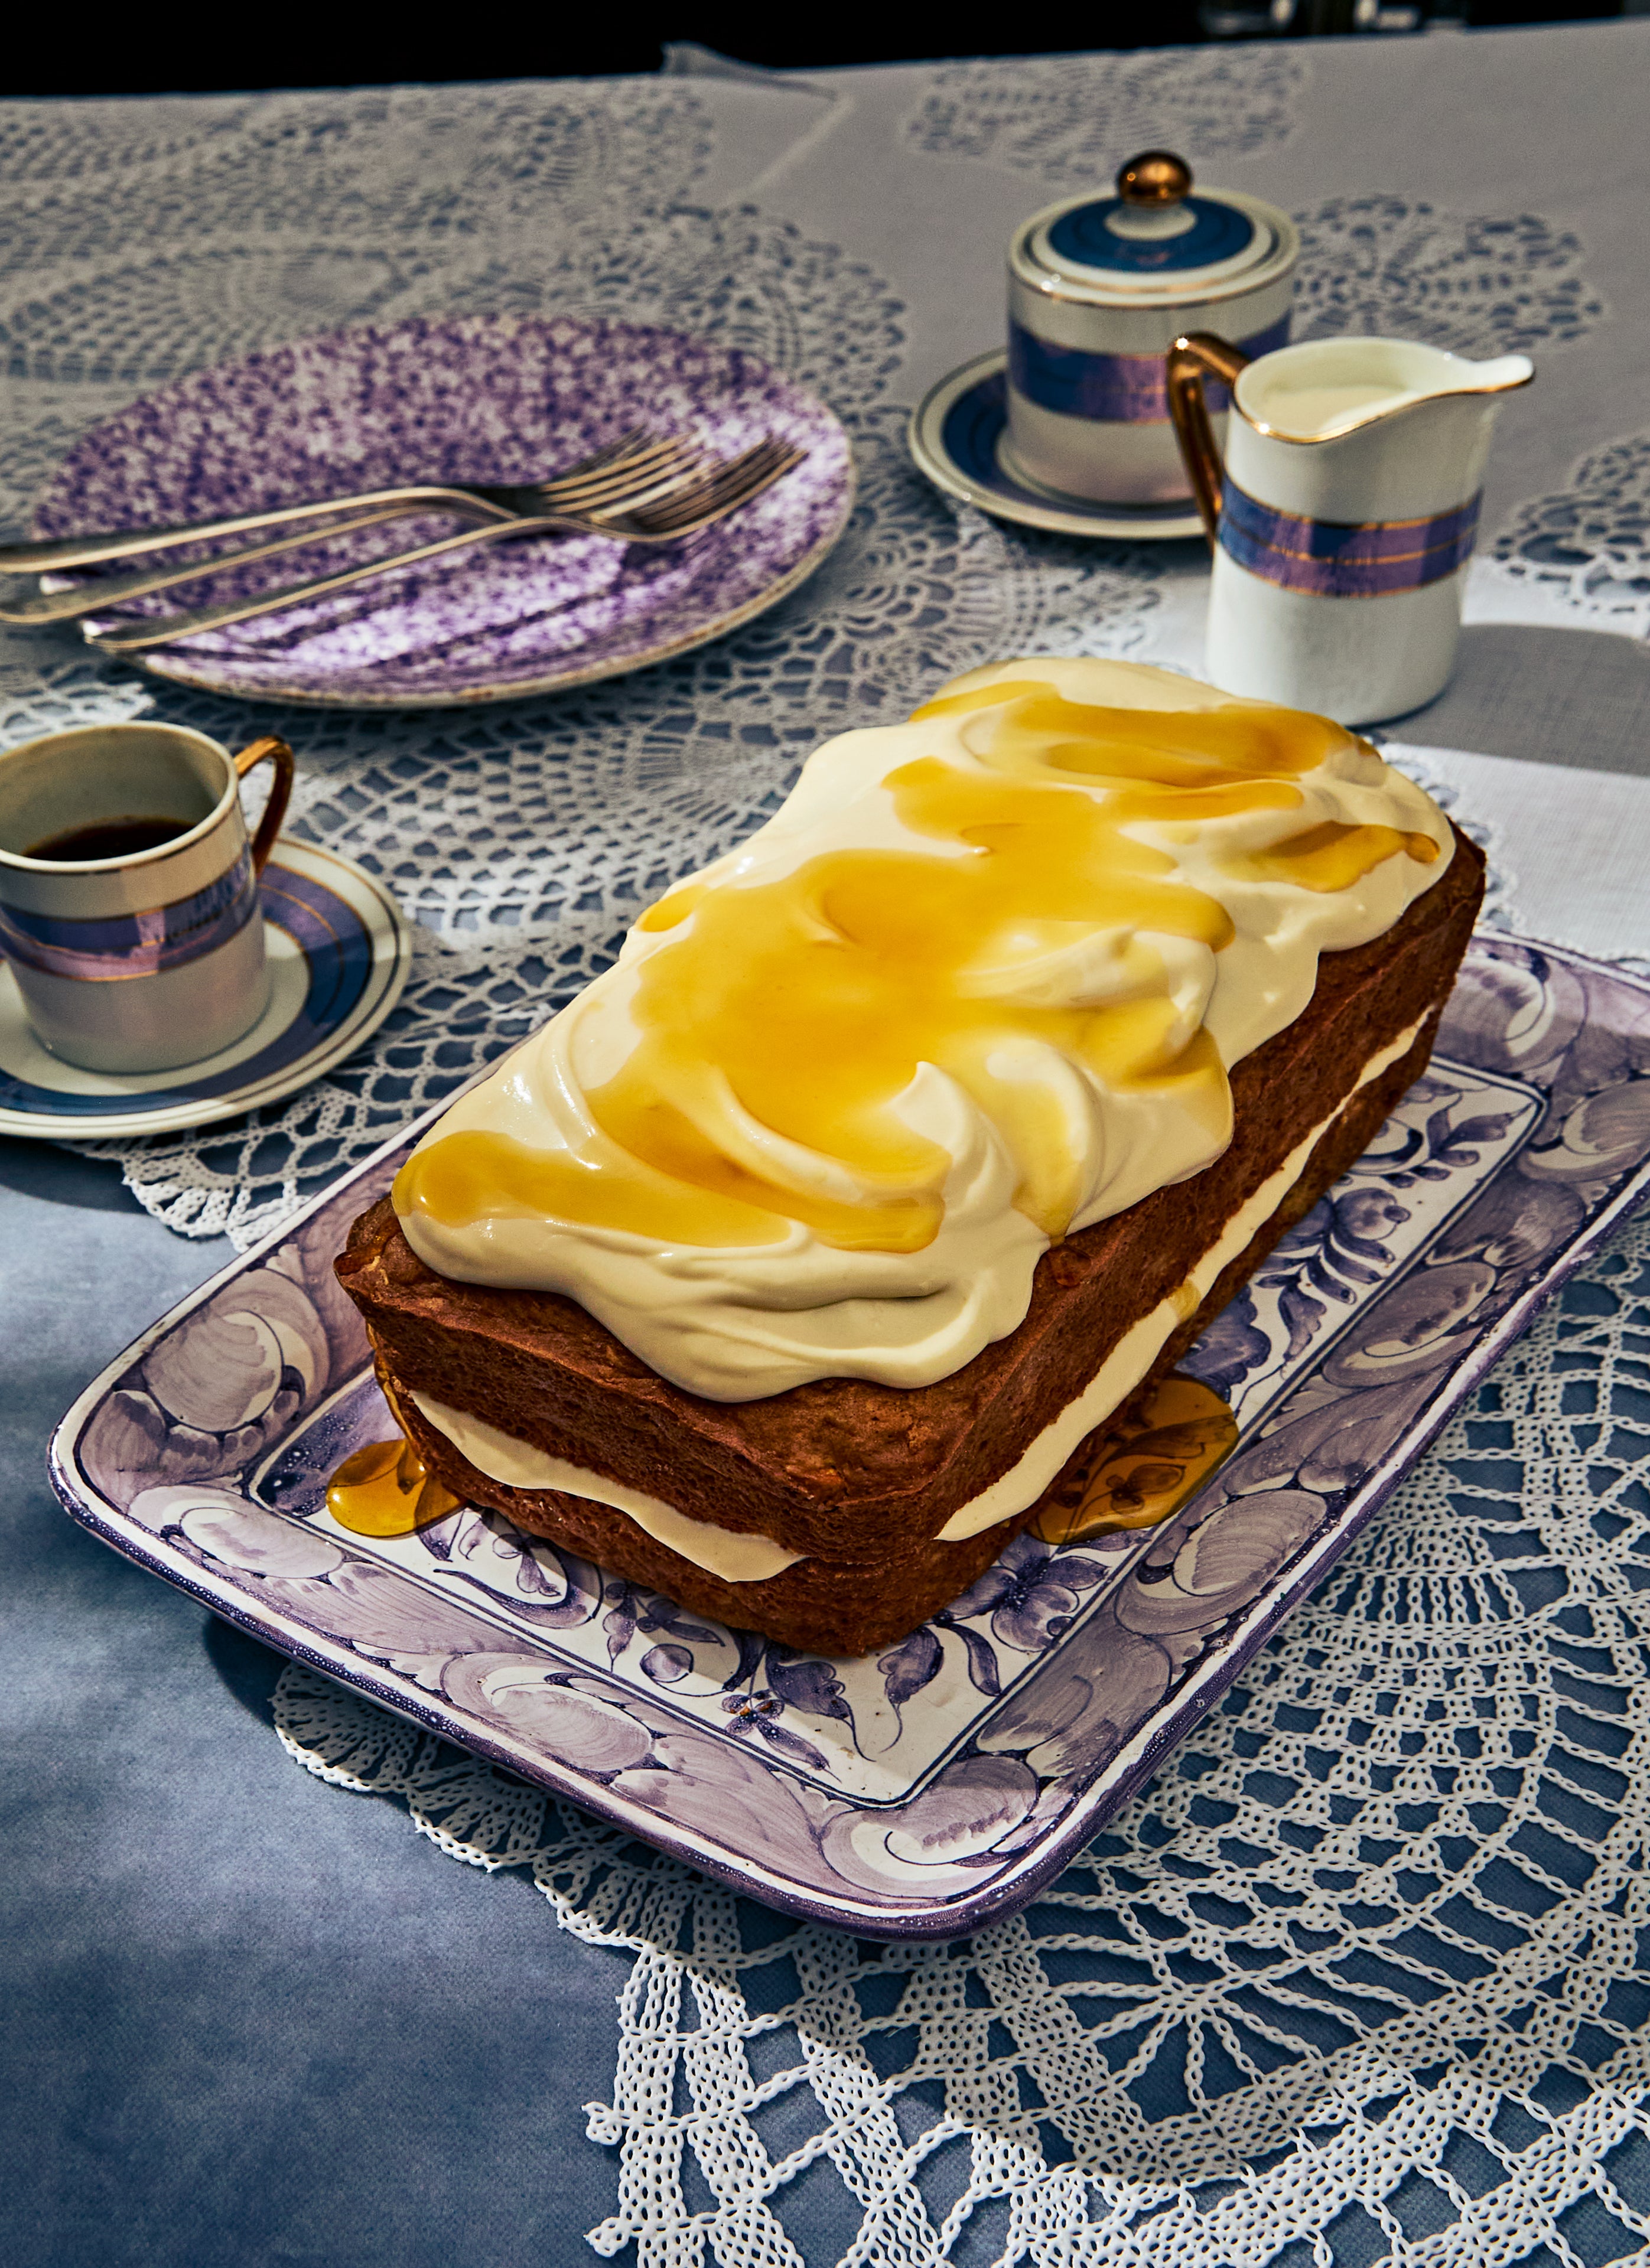
Morning Glorious Loaf Cake
Makes 1 loaf
Difficulty: 2 (Easy)
Active time: 45 minutes
Total time: 3 hours 40 minutes
Special equipment: Metal loaf pan
Ingredients:
— Melted coconut oil for the pan
— 1 small Granny Smith apple (5 oz / 143g), peeled and grated on the large holes of a box grater
— 4 ounces (114g) carrots, peeled and grated on the small holes of a box grater (about 1 cup)
— ¼ cup dried unsweetened shredded coconut (0.8 oz / 23g)
— ¼ cup salted roasted sunflower seeds (1.2 oz / 35g)
— 12/3 cups all-purpose flour (7.9 oz / 225g)
— 2 teaspoons ground cinnamon
— 1 teaspoon ground ginger
— 1 ½ teaspoons baking powder
— 1 teaspoon kosher salt or ½ teaspoon table salt
— ½ teaspoon baking soda
— ½ cup packed light brown sugar (3.9 oz / 110g)
— 2 large eggs (3.5 oz / 100g), at room temperature
— ½ cup unsweetened applesauce (4.2 oz / 120g)
— ¼ cup plus 3 tablespoons maple syrup (5.2 oz / 148g), plus more for drizzling
— 2⁄3 cup virgin coconut oil (5.3 oz / 149g), gently warmed to liquefy
— 8 ounces (227g) cream cheese, at room temperature
Method:
1. PREHEAT THE OVEN AND PREPARE THE PAN: Arrange an oven rack in the centre position and preheat the oven to 175°C. Brush the bottom and sides of a metal loaf pan with a thin layer of melted coconut oil. Line the bottom and two longer sides with a piece of parchment paper, leaving a few centimetres of overhang on both sides. Brush the parchment paper with more oil and set aside.
2. COMBINE THE MIX-INS: In a medium bowl, toss together the apple, carrot, coconut, and sunflower seeds to combine. Set the mix-ins aside.
3. MIX THE DRY INGREDIENTS: In a large bowl, whisk together the flour, cinnamon, ginger, baking powder, salt, and baking soda until combined. Set aside.
4. MIX THE WET INGREDIENTS: In a separate medium bowl, whisk together the brown sugar, eggs, applesauce, and ¼ cup (3 oz / 85g) of the maple syrup until combined, then whisk vigorously until the mixture is smooth and slightly thickened, about 1 minute. Add the coconut oil and whisk until the mixture is smooth and satiny, about 20 seconds.
5. MAKE THE BATTER: Make a well in the centre of the dry ingredients and pour in the wet ingredients. Whisk, starting at the centre of the bowl and working outward, until you have a smooth, evenly mixed batter with no dry spots. Add the mix-ins and fold with a flexible spatula until everything is well combined.
6. FILL THE PAN AND BAKE: Scrape the batter into the prepared loaf pan and use the spatula to work it into the corners, then smooth the surface. Bake until the surface of the cake is risen and split, the centre of the split looks dry, and a skewer or cake tester inserted into the tallest part of the loaf comes out clean, 50 to 60 minutes. Let the cake cool in the pan for 20 minutes, then use a paring knife or small offset spatula to cut down between the cake and the pan along the shorter sides. Use the parchment overhang to lift out the loaf and transfer it to a wire rack. Let the cake cool completely.
7. MAKE THE FROSTING: In a medium bowl, combine the cream cheese and the remaining 3 tablespoons maple syrup and work with a flexible spatula until the mixture is mostly smooth (a few lumps are fine). Switch to a whisk and beat vigorously until the mixture is lump-free and slightly fluffy, about 1 minute. Set the frosting aside.
8. SPLIT AND FROST THE CAKE: Rest the cooled loaf on one of its longer sides on a cutting board and use a serrated knife to slice lengthwise down through the loaf, splitting it into two horizontal layers. Place the bottom layer on a plate or serving platter and spread half of the frosting over the cut surface, working it all the way to the edges. Gently place the top layer back over the bottom and spread the remaining frosting over the top of the loaf. Transfer the loaf to the refrigerator and chill just until the frosting is set, 10 to 15 minutes.
9. SERVE: Drizzle the loaf with more maple syrup. Cut into slices with a serrated knife and serve.
Can I . . .
Make it ahead? Yes. The frosted cake, covered and refrigerated, will keep for up to 4 days (refrigerate the cake uncovered to set the frosting, then cover). Let it come to room temperature before serving. The baked but unsplit and unfrosted cake, well wrapped and stored at room temperature, will keep for up to 4 days. Split and frost before serving.
Make any substitutions? Yes. You can replace the coconut oil with an equal quantity of neutral oil, such as grapeseed or avocado, or olive oil. For the sunflower seeds, you can substitute an equal quantity of any other roasted seed or chopped nut, such as walnuts, pecans, or pumpkin seeds.
Bake this in a different pan? Yes. Bake the cake in a metal baking pan brushed with oil and lined across the bottom and two opposite sides with parchment paper, or in a round cake pan brushed with oil and lined with a silicone or parchment round. In either pan, start checking for doneness around 35 minutes. Leave the cake whole and frost just the top.
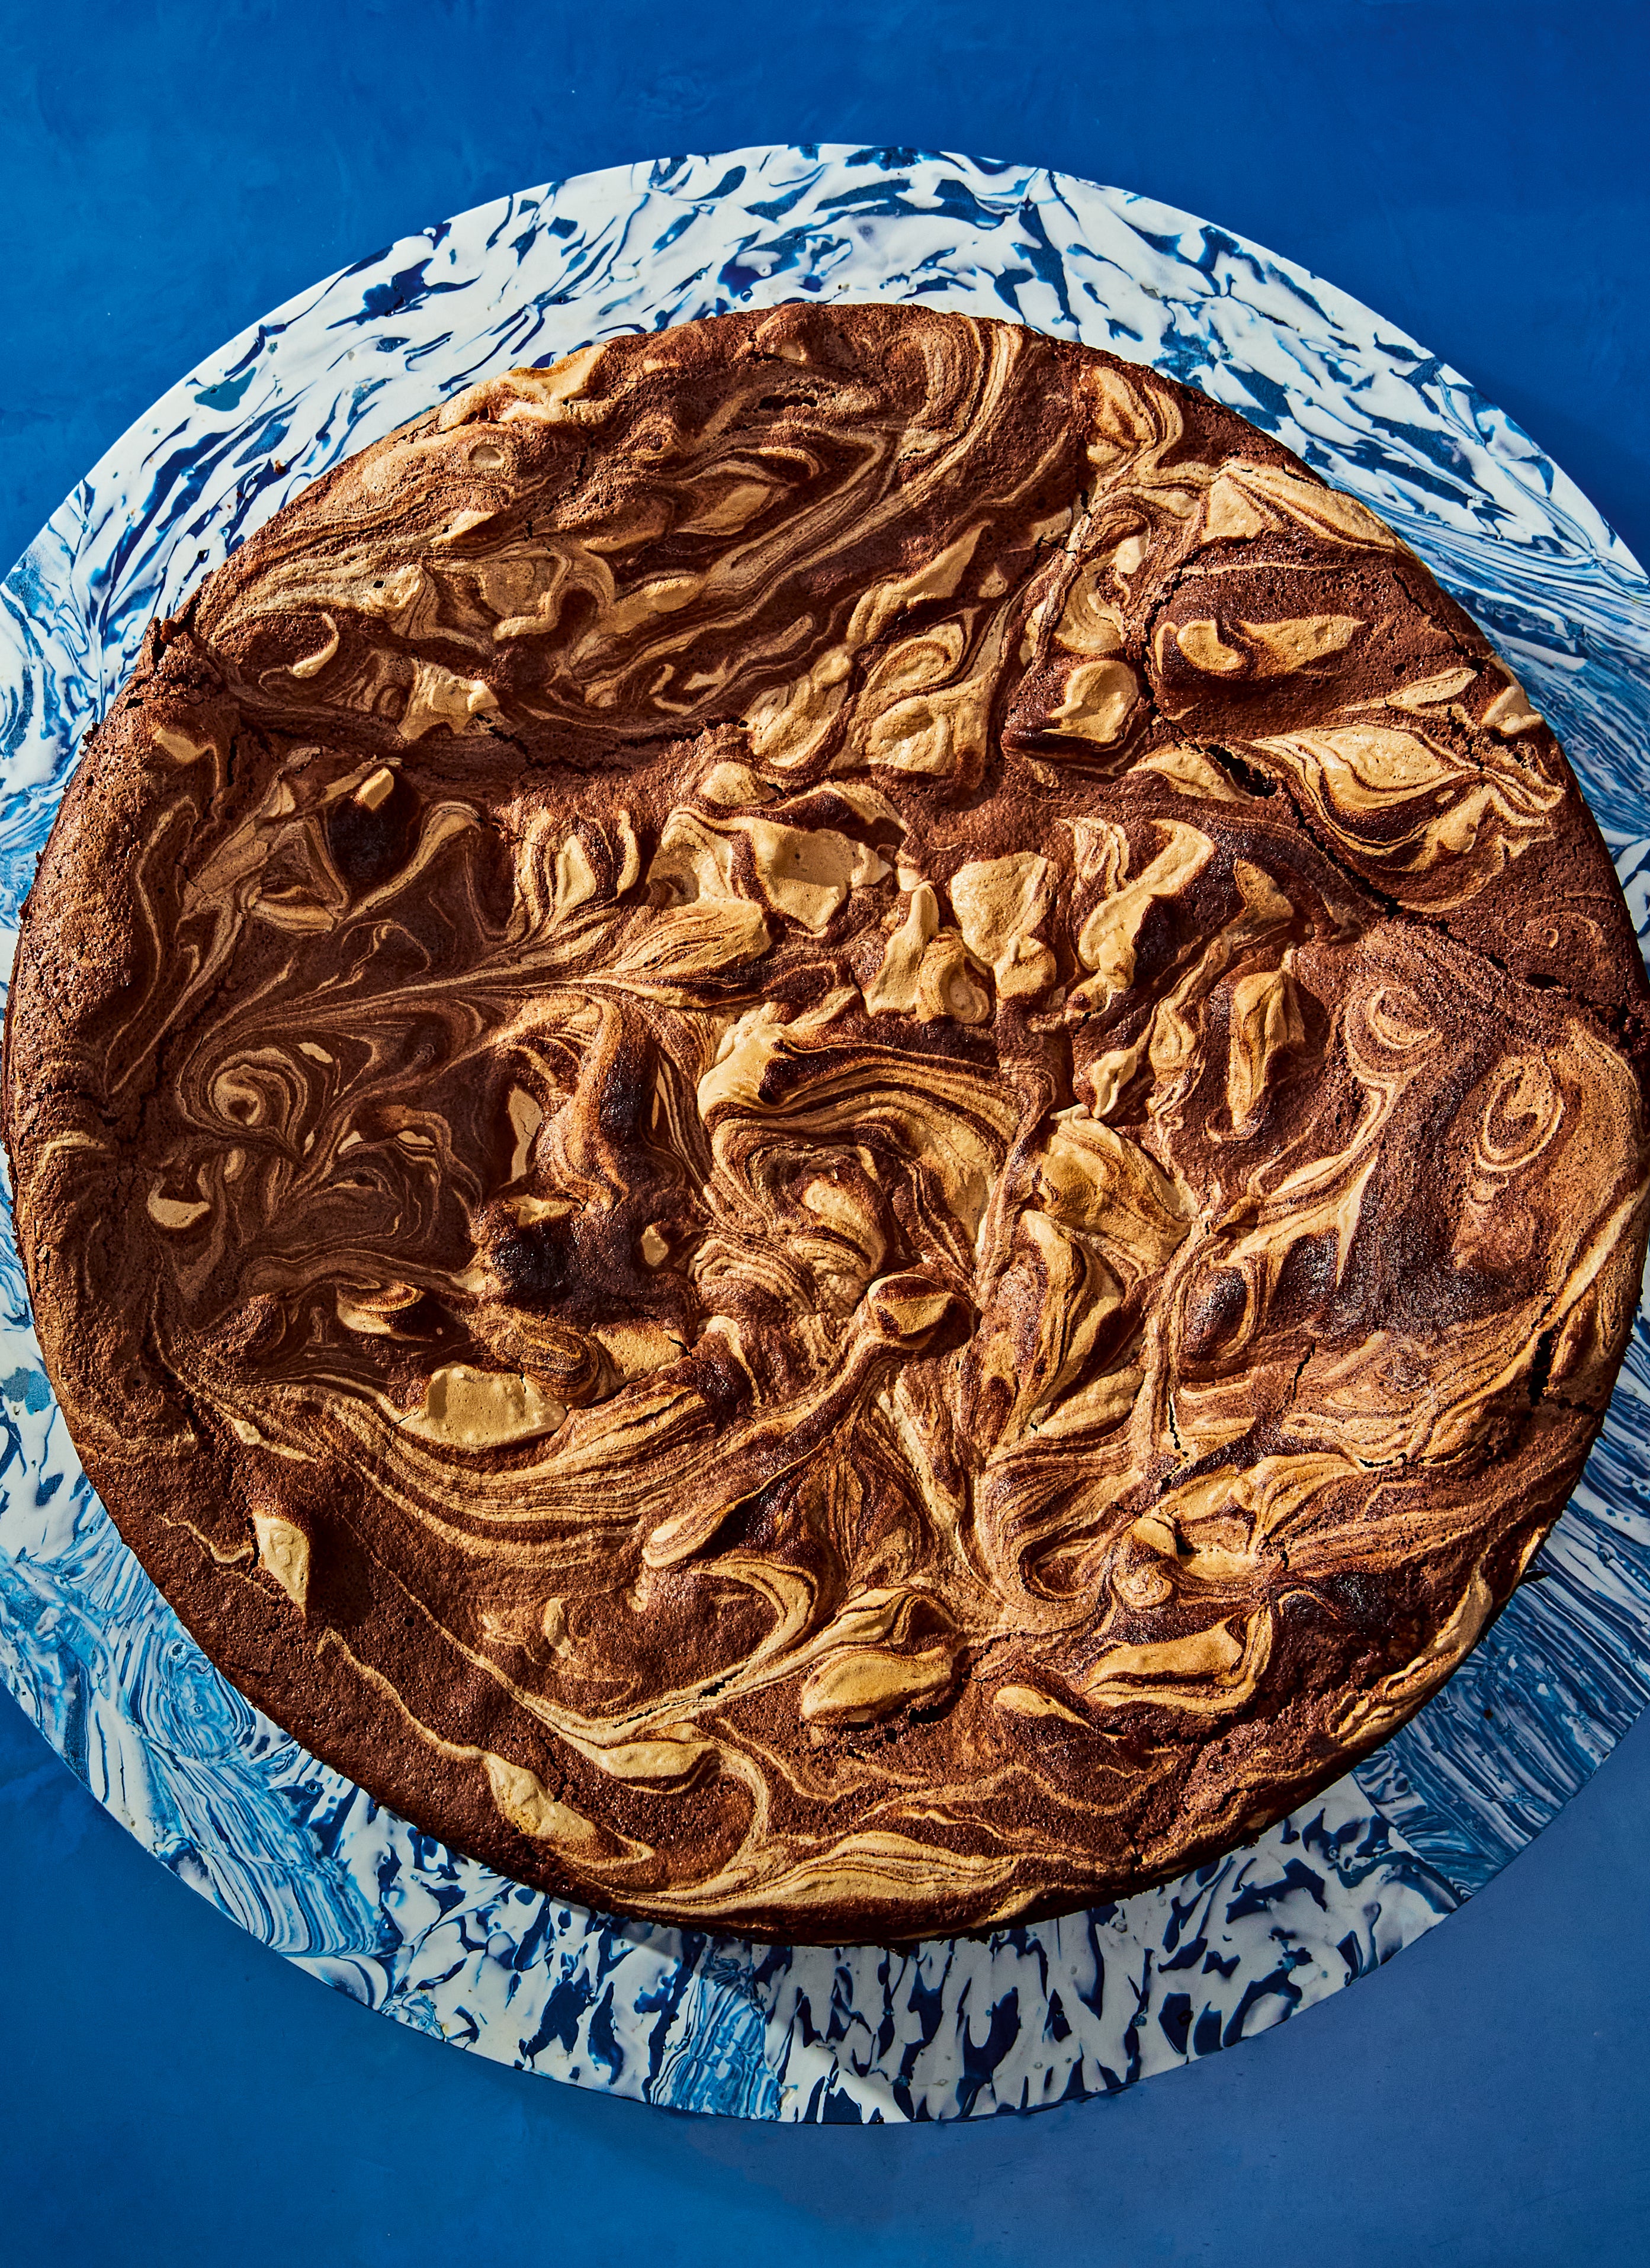
Flourless Chocolate Meringue Cake
Serves 10
Difficulty: 2 (Easy)
Dairy-free, gluten-free
Active time: 30 minutes
Total time: 1 hour 40 minutes, plus time to cool
Special equipment: 23 cm springform pan, hand mixer
Ingredients:
— Neutral oil for the pan
— 10 ounces (283g) semisweet chocolate (64%-70% cacao), coarsely chopped
— 6 tablespoons neutral oil, such as grapeseed or avocado (3 oz / 84g)
— ¼ cup brewed coffee (2 oz / 57g)
— 1½ teaspoons kosher salt or ¾ teaspoon table salt, plus a pinch
— 5 large eggs (8.8 oz / 250g), whites and yolks separated, at room temperature
— 2 teaspoons vanilla extract
— 1 cup sugar (7 oz / 200g), divided
— ¾ cup almond flour (2.5 oz / 70g), sifted if lumpy
Method:
1. PREHEAT THE OVEN AND PREPARE THE PAN: Arrange an oven rack in the centre position and preheat the oven to 175°C. Brush the bottom and sides of the springform pan with oil, making sure to coat the sides all the way to the rim. Line the bottom with a silicone or parchment round and brush with more oil, then set the pan aside.
2. MELT THE CHOCOLATE MIXTURE: Fill a medium saucepan with about 3 cm of water and bring to a simmer over medium heat, then reduce the heat to maintain a gentle simmer. In a large heatproof bowl, combine the chocolate, oil, coffee, and 1½ teaspoons salt and set it over the saucepan, taking care that the bottom of the bowl doesn’t touch the water. Stir occasionally with a heatproof flexible spatula until the chocolate is melted and the mixture is completely smooth, then remove the bowl from the heat and set aside.
3. WHISK IN THE YOLKS, SUGAR, AND ALMOND FLOUR: Add the egg yolks, vanilla, and ¼ cup (1.8 oz / 50g) of the sugar to the chocolate mixture and vigorously whisk to combine. Whisk in the almond flour until thoroughly combined. It will look broken and separated, which is okay! Add ¼ cup (2 oz / 57g) water and whisk vigorously until the mixture comes back together and looks smooth and glossy. Set the bowl aside.
4. MAKE THE MERINGUE: In a separate clean, large, non-plastic bowl, with a hand mixer, beat the egg whites and a pinch of salt on medium-low speed until the whites are broken up and frothy, about 20 seconds. Increase the speed to medium-high and continue to beat until the whites are foamy and opaque, about 30 seconds, then gradually add the remaining ¾ cup (5.3 oz / 150g) sugar in a slow, steady stream, beating constantly. Once all the sugar is added, increase the speed to high and continue to beat just until you have a dense, glossy meringue that holds a stiff peak (see page 339 for what this stage looks like). Try not to overbeat, or the whites will take on a dry, grainy texture and be difficult to incorporate.
5. MAKE THE BATTER: Scoop a heaping cup of the meringue and set it aside for swirling on top of the cake. Scrape about half of the remaining meringue into the bowl with the chocolate mixture and fold gently until just a few streaks remain. Scrape in the rest of the meringue and fold just until you have a light, airy, evenly mixed batter. Scrape the batter into the prepared pan, then dollop spoonfuls of the reserved meringue across the entire surface. Use a skewer or toothpick to swirl the meringue into the batter and vice versa. Swirl a little or a lot; it’s up to you.
6. BAKE: Bake the cake until the surface is risen and cracked, the meringue is light golden, and a skewer or cake tester inserted into the centre comes out shiny but clean, 1 hour to 1 hour 10 minutes. Remove the cake from the oven and place on a wire rack, then immediately run a paring knife or small offset spatula between the very top of the cake and the rim of the pan all the way around to loosen any areas that may be stuck (this will help the cake settle evenly as it cools). Let the cake cool completely. Cut around the sides again to loosen the cake, then remove the outer ring of the pan.
Can I . . .
Make it ahead? Yes. The cake, well wrapped and stored at room temperature, will keep for up to 4 days, but it’s best eaten on the first or second day while the meringue topping is still crispy (it will soften over time).
Make this nut-free? Yes. Although it’s not a common item in most grocery stores, sunflower seed flour is a good nut-free alternative to almond flour.
Use a stand mixer instead of a hand mixer? Yes. Combine the egg whites and salt in a stand mixer fitted with the whisk attachment and proceed with the recipe as written, noting that the meringue will whip faster and be easier to overbeat in the stand mixer.
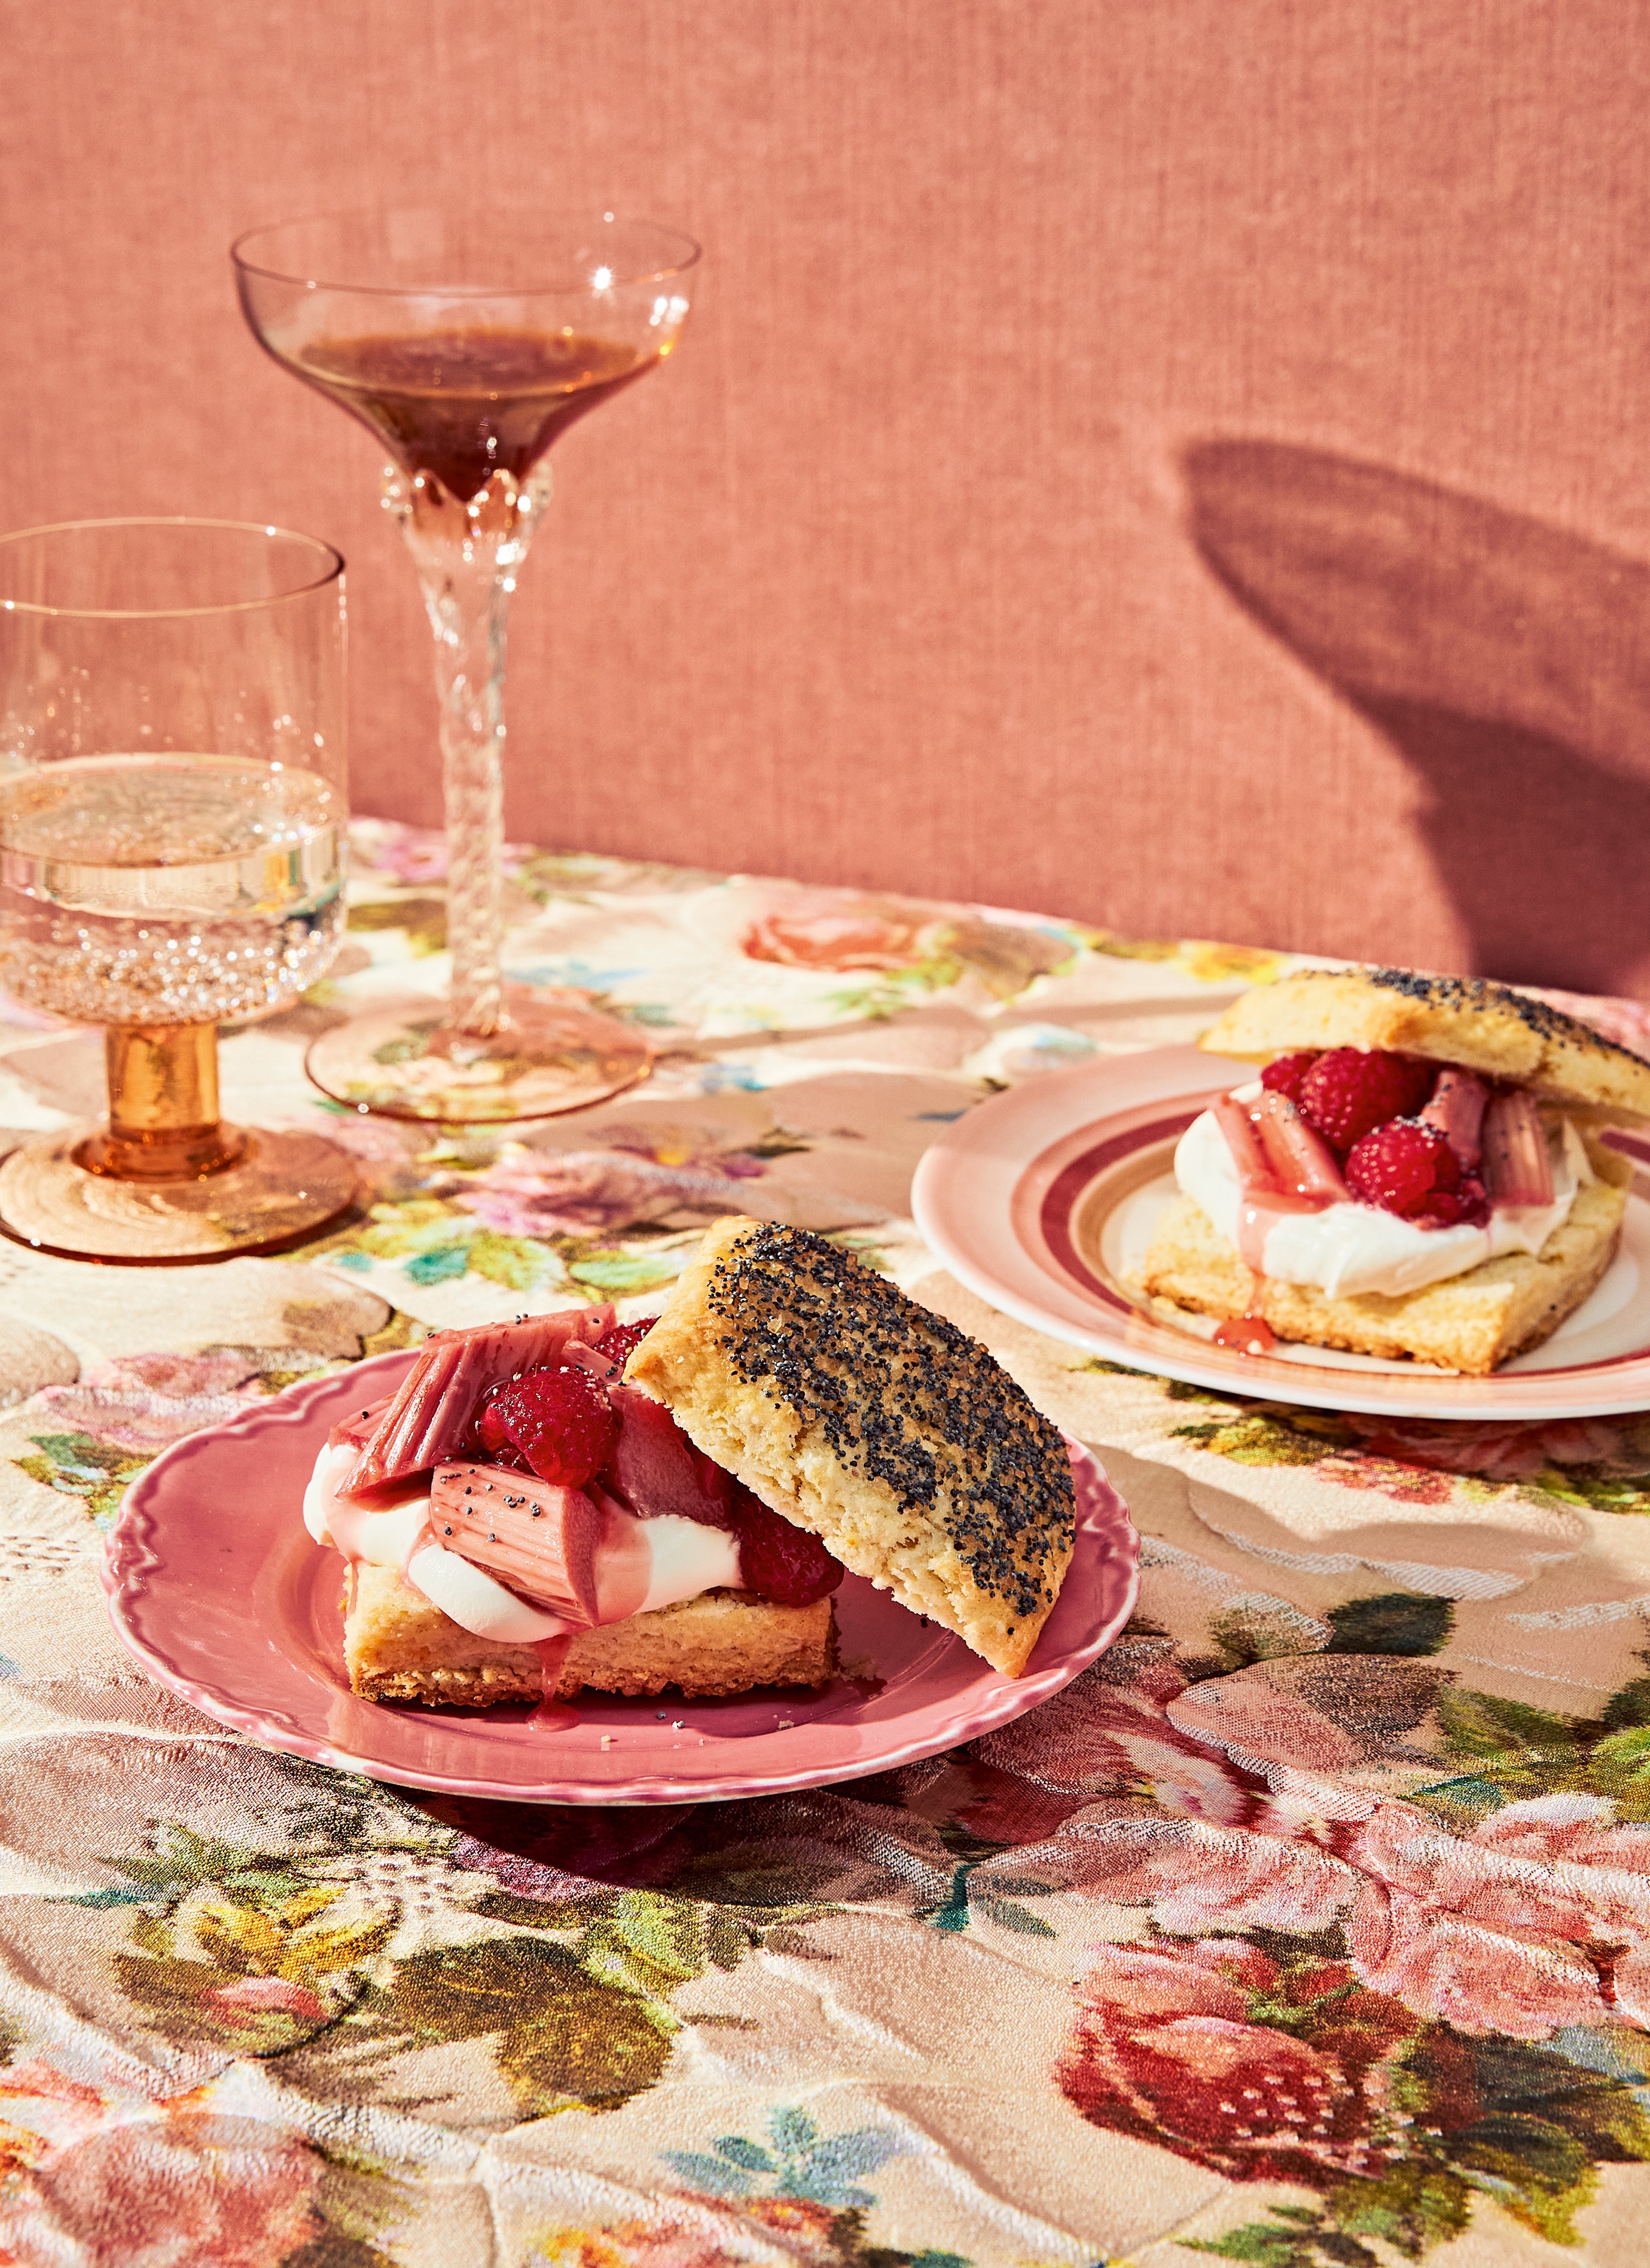
Rhubarb & Raspberry Shortcakes With Poppy Seeds
Serves 9
Difficulty: 2 (Easy)
Active time: 45 minutes (does not include making the shortcake dough)
Total time: 2 hours
Special equipment: Hand mixer
Ingredients:
POACHED RHUB ARB AND RASPBERRIES
— 1 cup dry white or rosé wine (8 oz / 227g)
— 1 cup granulated sugar (7 oz / 200g)
— ½ cup orange juice (4 oz / 113g)
— 2 teaspoons vanilla extract
— Pinch of kosher salt
— 12 ounces (340g) rhubarb stalks, halved lengthwise if thick, cut crosswise into 3-centimetre pieces (about 3 cups)
— 6 ounces (170g) raspberries (about 1½ cups)
SHORTCAKES AND ASSEMBLY
— All-Purpose Shortcake Dough (see below), cut into squares and chilled
— 1½ cups heavy cream (12.7 oz / 360g), chilled, plus more for brushing
— Poppy seeds, for sprinkling
— Demerara sugar, for sprinkling
— 8 ounces (227g) mascarpone cheese, chilled
Method:
1. POACH THE RHUBARB: In a large saucepan or small Dutch oven, combine the wine, granulated sugar, orange juice, vanilla, salt, and 1 cup (8 oz / 227g) water. Bring to a simmer over medium-high heat, stirring to dissolve the sugar. Once the poaching liquid is simmering, remove the saucepan from the heat and add the rhubarb. Cut a round of parchment paper the same diameter as the saucepan and place it directly on the surface of the poaching liquid, pressing out large air bubbles and allowing some of the liquid to pool on top of the parchment (this will keep the rhubarb in full contact with the poaching liquid so it cooks evenly). Set the saucepan back over medium heat just until you see gentle bubbling around the edge of the parchment, then remove from the heat immediately.
2. ADD THE RASPBERRIES AND LET COOL: Discard the round of parchment paper, add the raspberries to the saucepan, and stir delicately to incorporate. Set the saucepan aside to cool until lukewarm, 20 to 25 minutes — the rhubarb and raspberries will gently cook through from the residual heat.
3. REDUCE THE POACHING LIQUID: With a slotted spoon, gently lift out the warm rhubarb and raspberries, allowing excess liquid to drip back into the saucepan, and transfer the fruit to a bowl. Set aside. Place the saucepan with the poaching liquid over medium-high heat and bring to a boil, then continue to cook, whisking occasionally, until you have a thick, syrupy liquid that is reduced to about 1 cup, 15 to 20 minutes (pour it into a heatproof liquid measuring cup to check the volume and return to the saucepan and continue to reduce if it’s not there yet). Set the syrup aside to cool.
4. PREHEAT THE OVEN AND PREPARE THE SHEET PAN: Arrange an oven rack in the centre position and preheat the oven to 220°C. Line a large sheet pan with parchment paper and set aside.
Potential Pitfall: Do not use a silicone baking mat to line the pan, as it will cause the shortcakes to spread excessively and flatten during baking.
5. BAKE: Place the chilled, unbaked shortcakes on the lined pan, spacing them evenly. Brush the tops with cream and sprinkle generously with poppy seeds and demerara sugar, then bake until the shortcakes have risen and the tops are deep golden brown, 18 to 22 minutes, rotating the sheet pan front to back after 12 minutes. Set the shortcakes aside to cool on the sheet pan for10 minutes, then transfer them to a wire rack to cool completely.
6. WHIP THE MASCARPONE: In a large bowl, with a hand mixer, whip the mascarpone and 1½ cups (12.7 oz / 360g) cream on low speed to start and gradually increase the speed to medium-high as the mixture thickens, until you have a softly whipped cream that holds a droopy peak. Set the cream aside.
7. ASSEMBLE AND SERVE: Use a serrated knife to halve the shortcakes horizontally and remove the tops. Set the bottoms on serving plates and top each with a dollop of the whipped mascarpone, dividing it evenly. Spoon the rhubarb and raspberries (and a bit of the juices that have accumulated around them) on top, also dividing evenly, then sprinkle with poppy seeds. Drizzle the fruit with the reserved syrup (no need to use it all) and place the top halves over the shortcakes. Serve immediately.
Can I . . .
Make them ahead? Yes, but . . . wait to assemble them. The rhubarb and raspberries can be poached 1 day ahead. Transfer the fruit to a lidded container (be gentle, it’s fragile) and refrigerate, then reduce the poaching liquid to a syrup. Store the syrup in a separate airtight container in the refrigerator. Bring the fruit and syrup to room temperature before serving. The shortcakes are best served the day they’re baked, but the unbaked shortcakes can be wrapped well and frozen for up to 1 month.
Use another fruit? Yes. Instead of the poached rhubarb and raspberries, top the shortcakes with macerated sliced strawberries or blackberries or Slow- Roasted Plums.
SLOW-ROAST THE PLUMS: Toss the plum halves with 4 tablespoons (1.8 oz / 50g) of the demerara sugar in a 13 × 23-centimetre baking pan, then arrange the halves cut-sides down in a single layer (you can overlap them a bit if needed). Cover the baking dish tightly with foil and roast until the plums have released their juices and the flesh is soft but not mushy, 1 to 1½ hours. Un
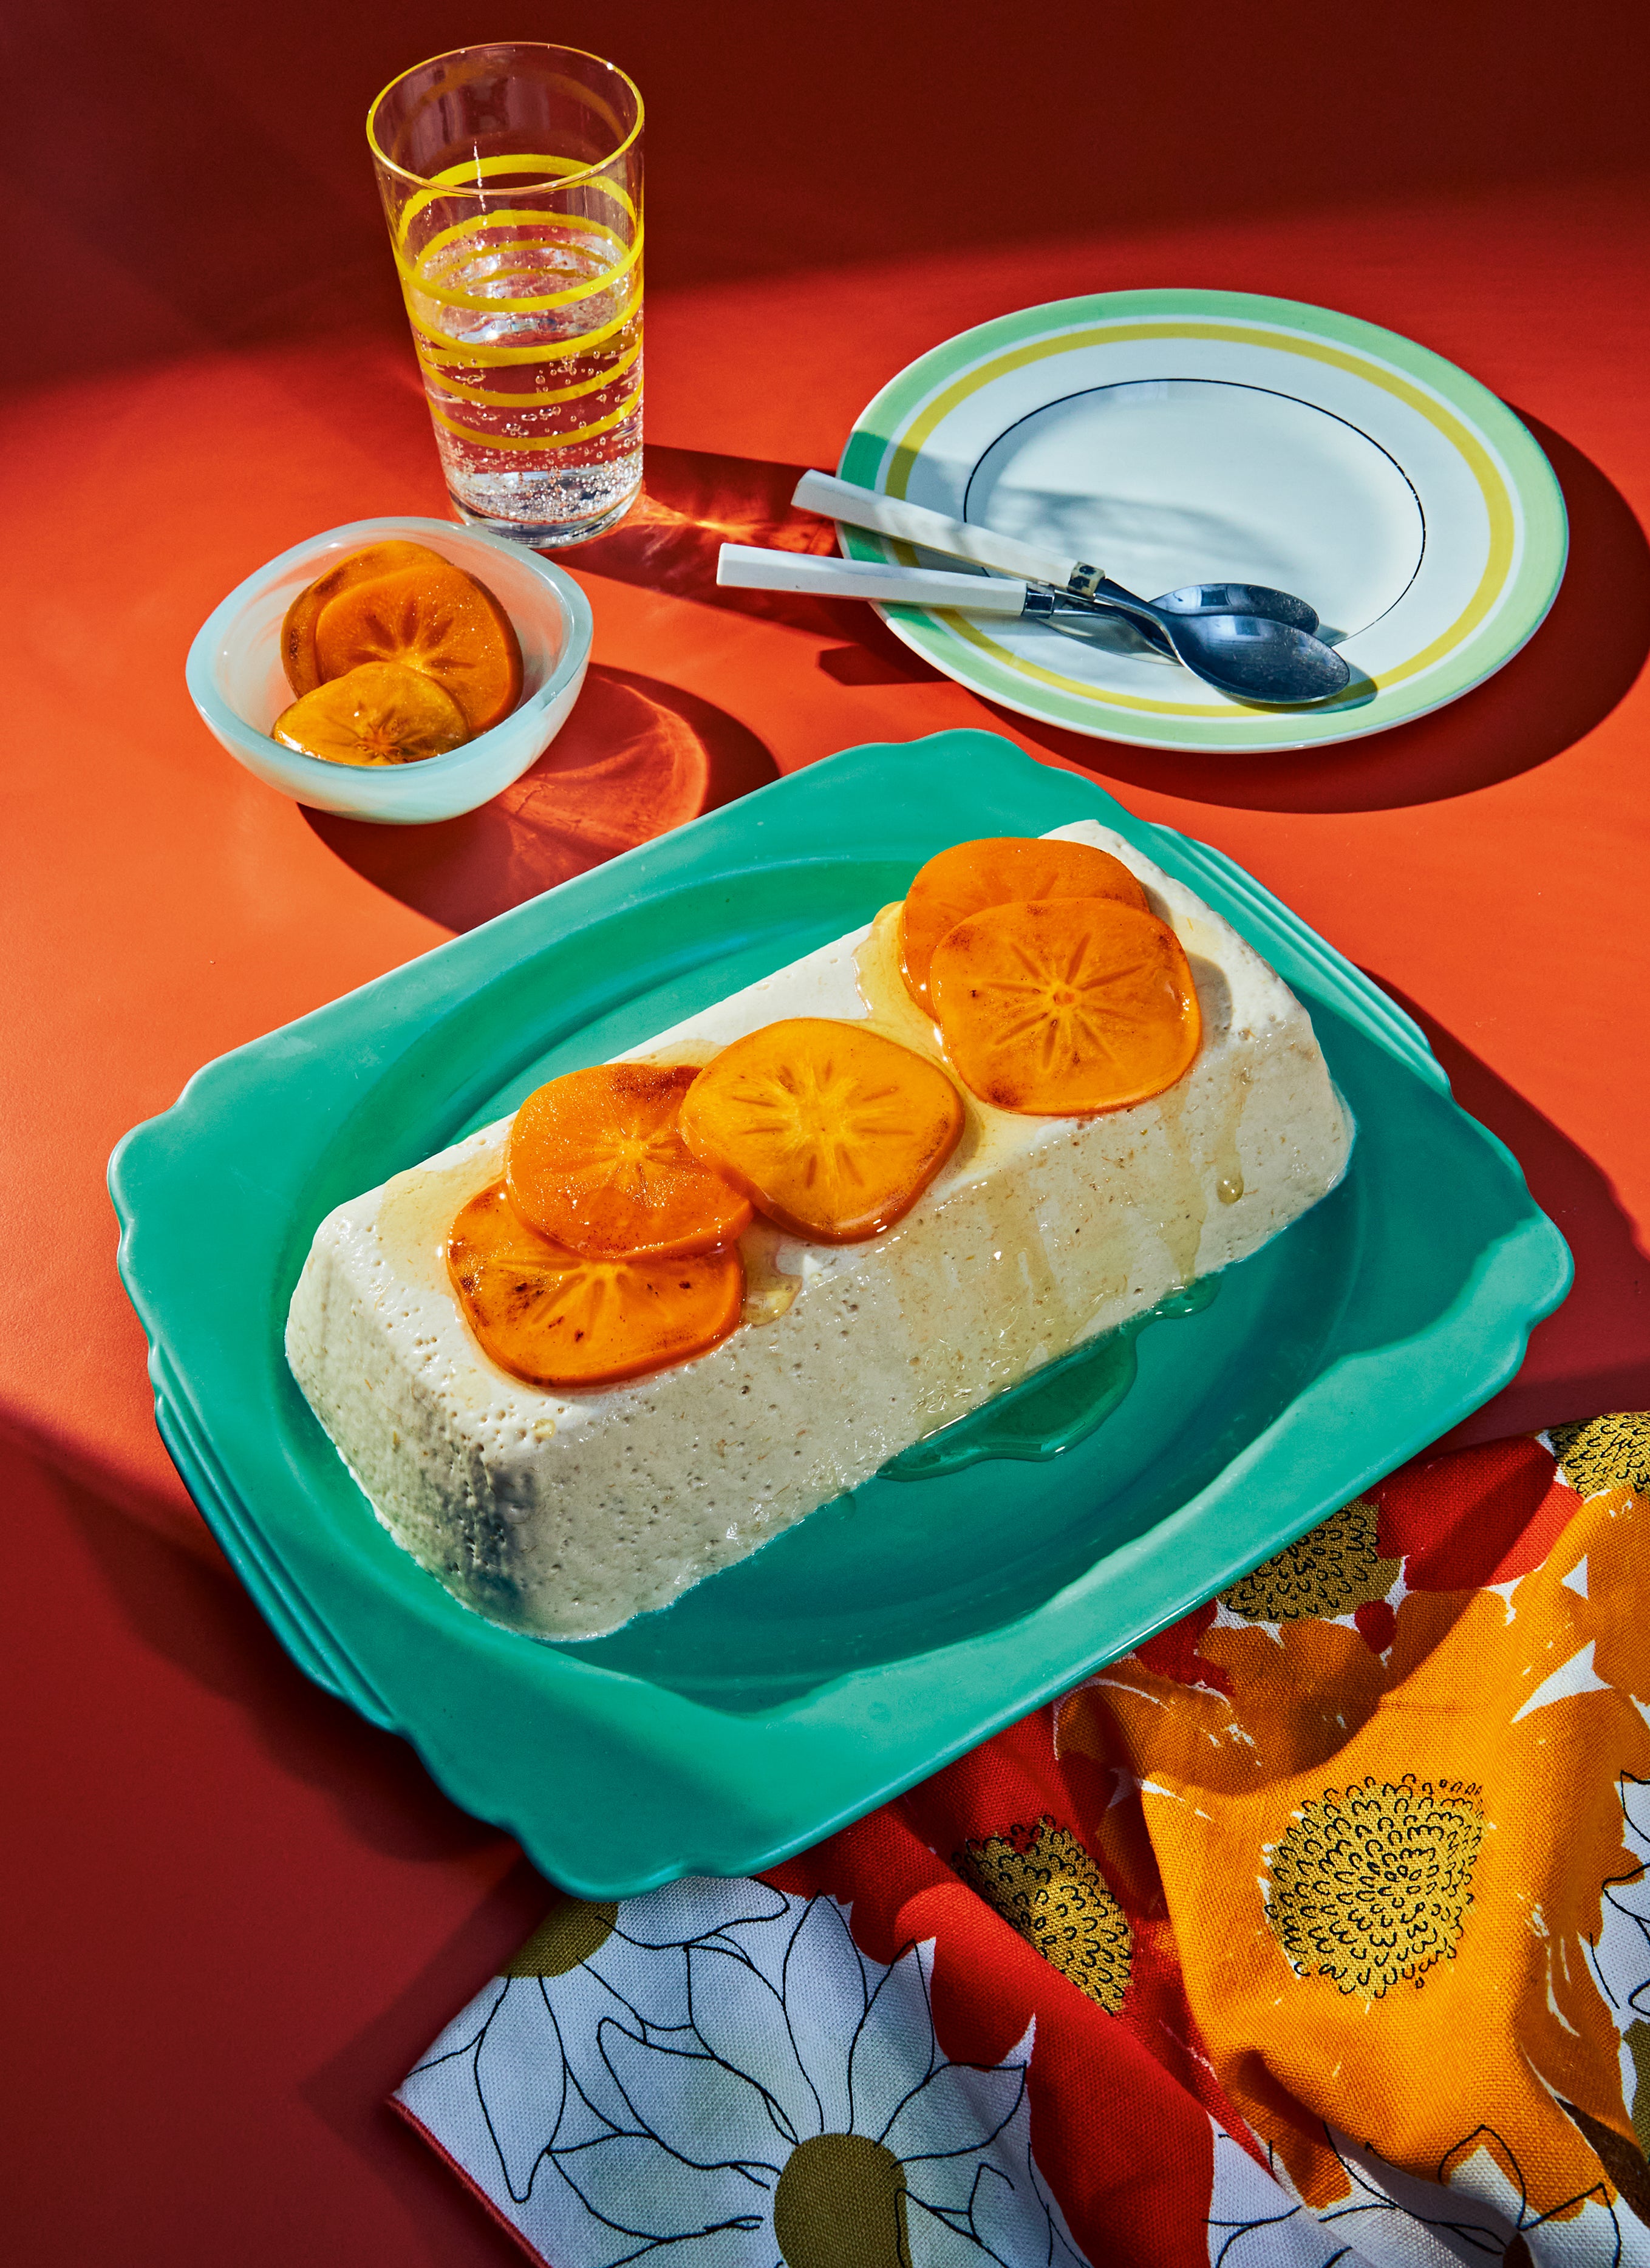
Persimmon Panna Cotta
Serves 8
Gluten-free
Difficulty: 1 (Very Easy)
Active time: 30 minutes
Total time: 4 hours
Special equipment: Loaf pan, blender (handheld or standard)
Ingredients:
— 2 teaspoons unflavoured gelatin powder
— Neutral oil for the pan
— 1¼ cups buttermilk (10.6 oz / 300g)
— 1 cup ripe Hachiya persimmon flesh (8.5 oz / 240g), scooped from about 2 medium persimmons
— 1 tablespoon finely grated lemon zest 1 teaspoon vanilla extract
— 1¼ cups heavy cream (10.6 oz / 300g)
— Pinch of kosher salt
— 1⁄3 cup plus 1 tablespoon sugar (2.8 oz / 79g)
— 2 medium Fuyu persimmons (about 10 oz / 284g)
— 2 tablespoons fresh lemon juice
Method:
1. SOFTEN THE GELATIN: Place 3 tablespoons (1.5 oz / 42g) cold tap water in a small shallow bowl and sprinkle the gelatin evenly over the top (do not stir). Set the bowl aside to allow the gelatin to soften, 5 to 10 minutes.
2. MEANWHILE, PREPARE THE PAN: Brush the bottom and sides of a loaf pan with a very thin layer of oil, then set aside.
3. MAKE THE BASE: In a large bowl, combine the buttermilk, Hachiya flesh, lemon zest, and vanilla and set aside. In a small saucepan, combine the heavy cream, salt, and 1⁄3 cup (2.3 oz / 65g) sugar and heat the mixture over medium-low heat, stirring often with a flexible spatula, just until the mixture is steaming and the sugar is dissolved, about 5 minutes. Pour the mixture into the bowl with the buttermilk mixture. Reserve the saucepan.
4. MELT THE GELATIN: Scrape the softened gelatin, which will have solidified, into the reserved saucepan (no need to wash it first) and warm over low heat, swirling until it’s melted and translucent with no visible granules, about 30 seconds. Remove from the heat and scrape into the bowl with the buttermilk mixture.
5. Potential Pitfall: If the gelatin isn’t fully melted, the panna cotta will not set, so be very sure the mixture is free of granules. Don’t let it boil.
6. BLEND AND CHILL THE BASE: Use a handheld blender to blend the buttermilk mixture until smooth. (Alternatively, blend the mixture in a standard blender on medium speed until smooth.) Pour the base into the prepared pan and cover. Refrigerate until the panna cotta is set, at least 4 hours.
7. MACERATE THE FUYU PERSIMMONS: About 30 minutes before serving, slice the Fuyu persimmons horizontally into thin rounds (discard the very bottom and the leafy stem end). In a small bowl, toss the slices with the lemon juice and remaining 1 tablespoon sugar until coated. Let the slices sit, gently tossing once or twice, until they’re softened and have released their juices, about 20 minutes.
8. SERVE: Just before serving, fill a large bowl with several centimetres of hot tap water. Remove the pan from the refrigerator, uncover, and lower the bottom and sides into the water for several seconds. Run a knife around the sides of the panna cotta, pressing the knife firmly against the pan, then invert the pan onto a serving platter. Tap the platter on the counter to release the panna cotta (it might take several seconds), then remove the pan. Top the panna cotta with some of the sliced persimmons and their juices. Serve slices of panna cotta with the remaining persimmons on the side.
Can I . . .
Make it ahead? Yes. The panna cotta, covered and refrigerated, will keep for up to 3 days, but is best served within the first 2 days.
Halve the recipe? Yes. Halve all of the above ingredient quantities and follow the recipe as written. You will have a thinner panna cotta that serves four.
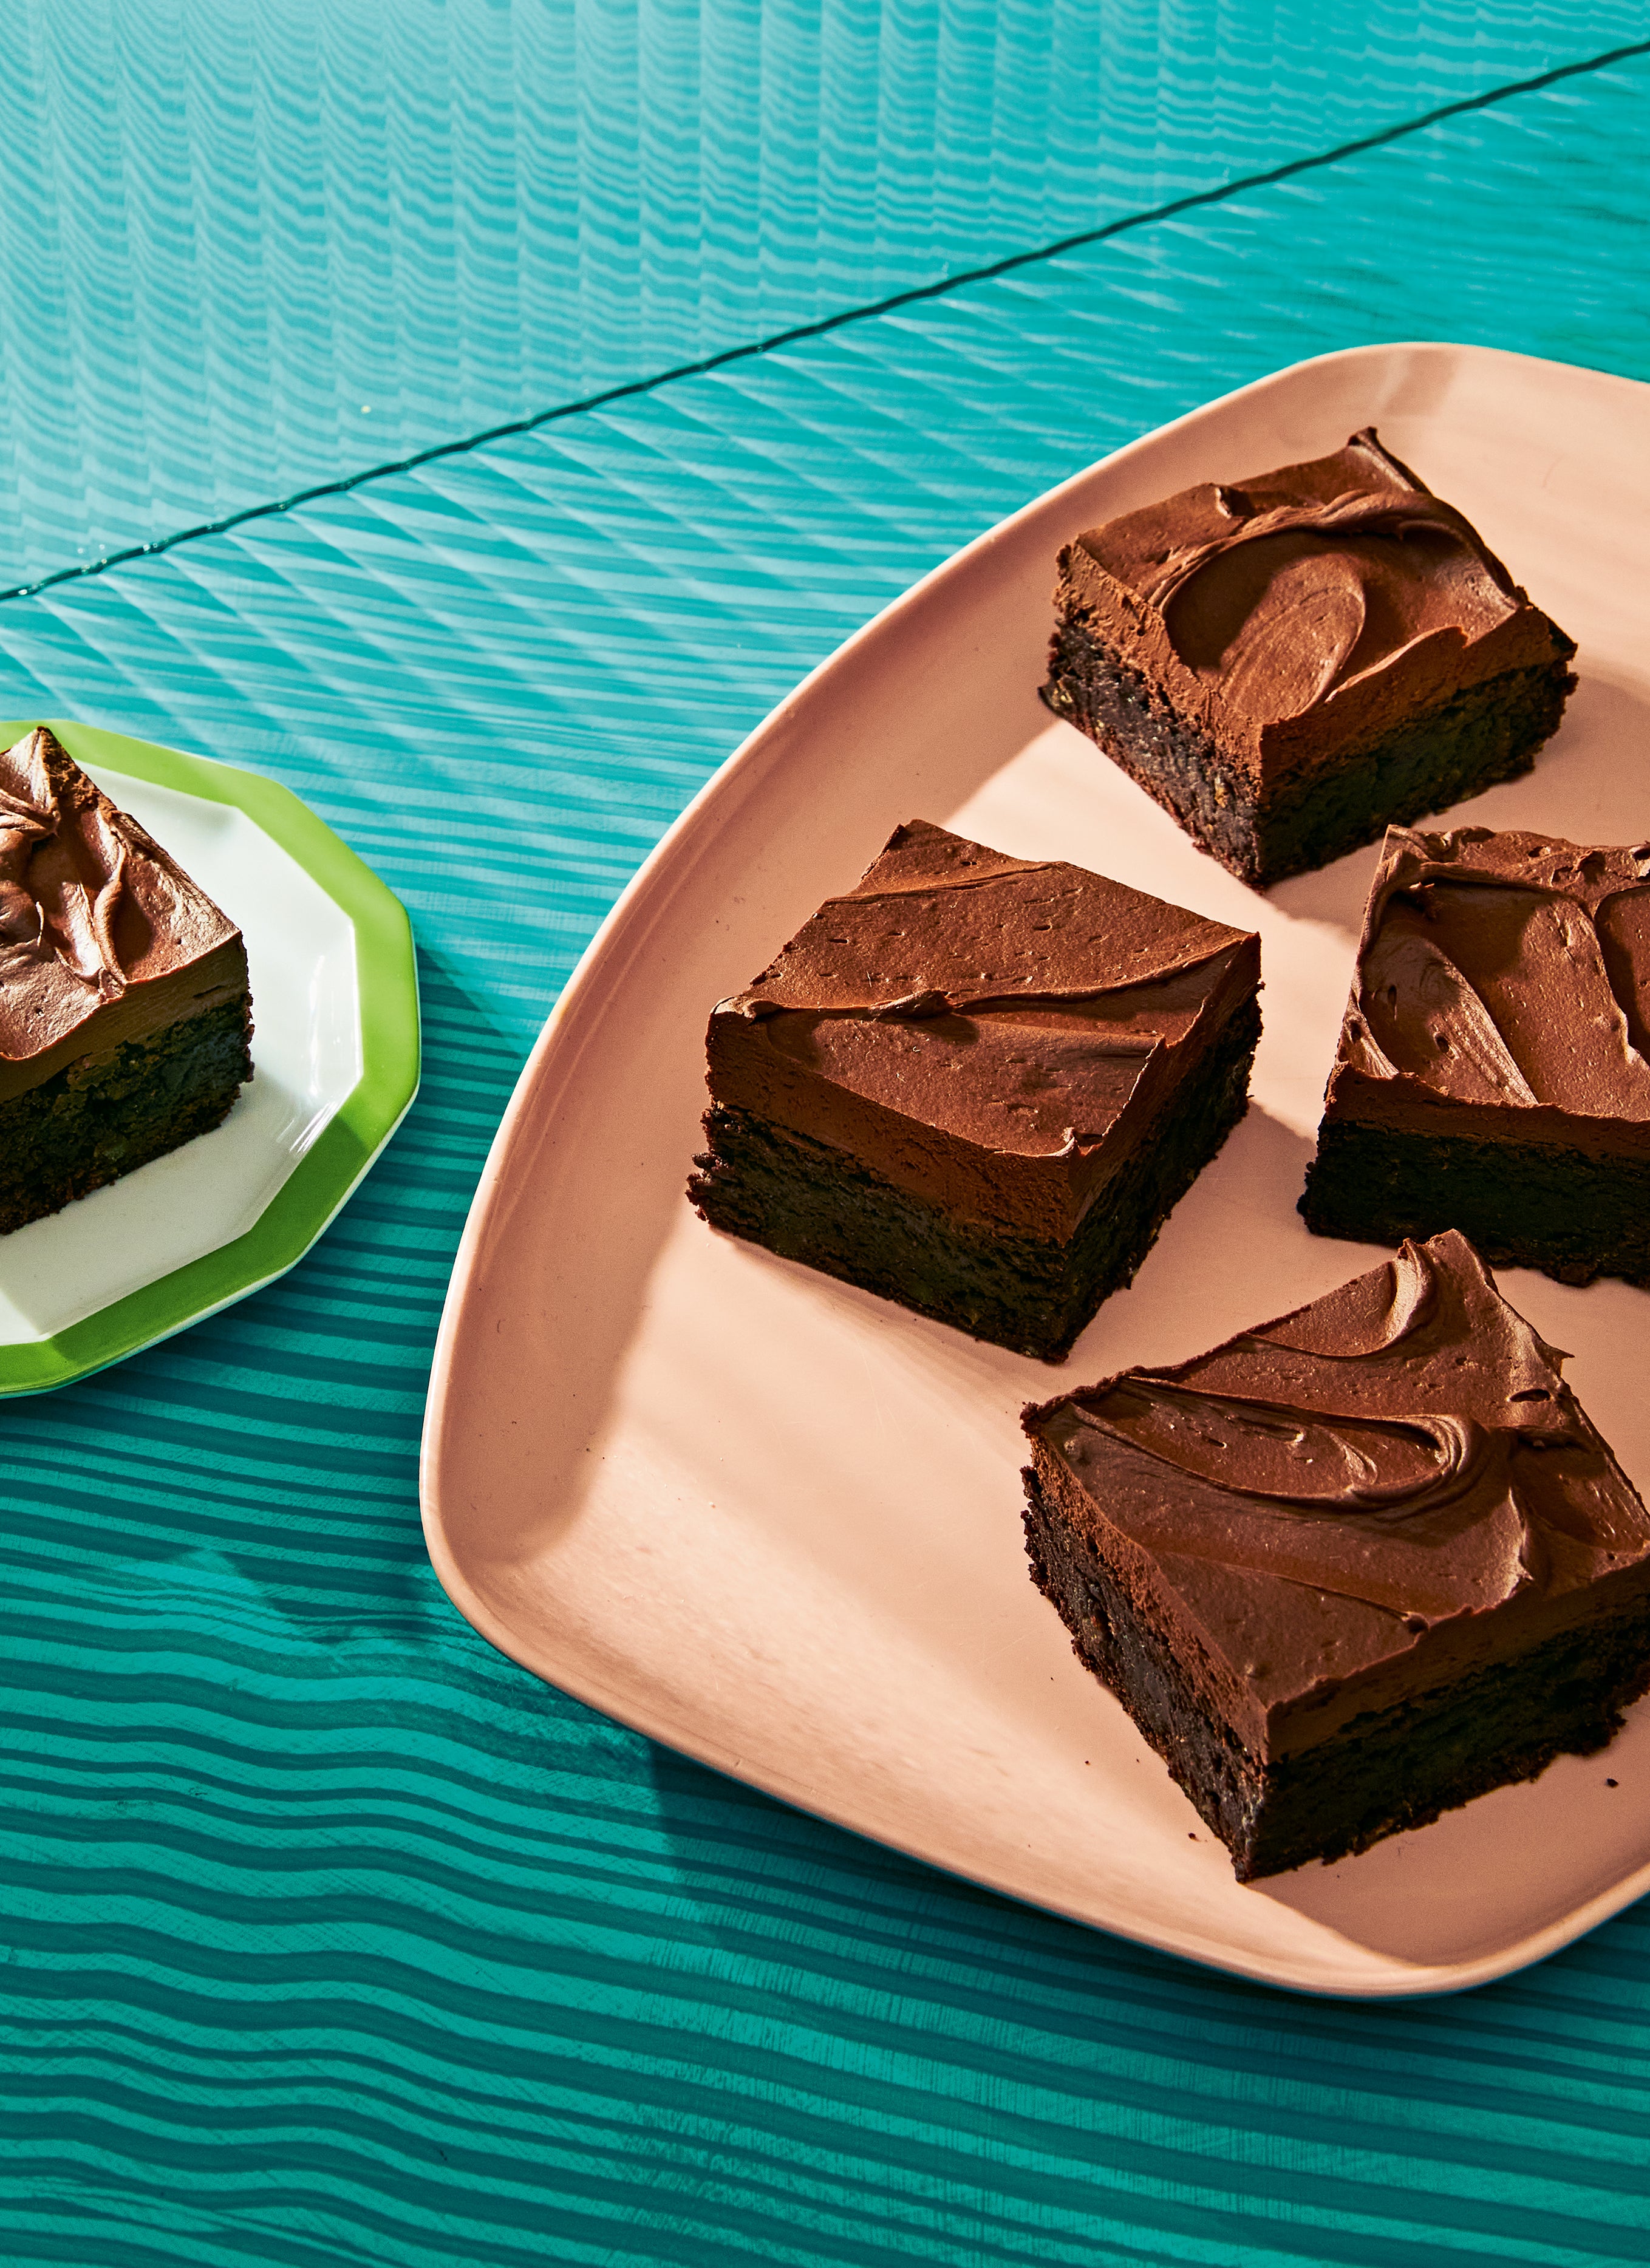
Cocoa-Chestnut Brownies
Makes 16 brownies
Difficulty: 1 (Very Easy)
Active time: 45 minutes
Total time: 2 hours 15 minutes
Special equipment: 20cm × 20 cm baking pan (preferably metal), potato masher
Ingredients:
— 1½ sticks unsalted butter (6 oz / 170g), cut into pieces
— 7 ounces (198g) peeled roasted chestnuts, from a bag or jar (about 1¼ cups), rinsed and patted dry
— 2⁄3 cup unsweetened cocoa powder (1.8 oz / 50g), sifted if lumpy
— 2 large eggs (3.5 oz / 100g), cold from the refrigerator
— 1 cup granulated sugar (7 oz / 200g)
— ¼ cup packed light brown sugar (1.9 oz / 55g)
— 2 teaspoons vanilla extract
— ¾ cup all-purpose flour (3.5 oz / 100g)
— 1 teaspoon kosher salt or ½ teaspoon table salt
— 6 ounces (170g) semisweet chocolate (64%–70% cacao), chopped
— 2⁄3 cup heavy cream (5.6 oz / 160g)
Method:
1. PREHEAT THE OVEN AND PREPARE THE PAN: Arrange an oven rack in the centre position and preheat the oven to 175°C. Line a baking pan, preferably metal, with foil, pressing it into the corners and smoothing it up the sides. Melt the butter in a small saucepan over medium-low heat, then remove it from the heat. Use a pastry brush to coat the bottom and sides of the foil with a thin layer of the melted butter, then set the pan aside.
2. COOK THE CHESTNUTS: Set the saucepan of melted butter over medium heat and add the chestnuts. Bring the mixture to a simmer and sizzle the chestnuts in the butter, mashing them occasionally with a potato masher, until the chestnuts are fragrant and have broken down into a coarse paste with the biggest pieces about the size of a lentil. Remove the saucepan from the heat and add ¼ cup (2 oz / 57g) water and the cocoa powder and whisk until smooth. Set the saucepan aside and let cool slightly.
3. WHISK THE EGGS, SUGAR, AND VANILLA: In a medium bowl, whisk the eggs until they’re streak-free, then add the granulated sugar, brown sugar, and vanilla and whisk vigorously until the mixture is slightly pale, about 1 minute.
4. MAKE THE BATTER: Scrape the chestnut mixture into the bowl with the egg mixture and whisk to combine, then whisk in the flour and salt. Switch to a flexible spatula and fold the mixture several times, scraping the bottom and sides of the bowl, until the batter is smooth.
5. BAKE: Scrape the batter into the prepared pan, working it to the sides and corners with the spatula in an even layer. Bake until the surface of the brownies is puffed, dry, and firm to the touch, 22 to 28 minutes. Let the brownies cool completely in the pan.
6. MEANWHILE, MAKE THE GANACHE: Place the chopped chocolate in a medium heatproof bowl. In a small saucepan, heat the cream over medium heat just until you see gentle bubbling around the sides. Remove the saucepan from the heat and set it aside for about 30 seconds to cool slightly, then pour it over the chocolate. Let the chocolate sit for about a minute, then whisk the ganache gently, starting in the centre of the bowl and working outward, until the mixture is completely smooth. Let the ganache cool, whisking occasionally, until it’s thickened and spreadable, 35 to 45 minutes.
7. SPREAD THE GANACHE OVER THE BROWNIES: Use the foil to lift the cooled brownies out of the pan and transfer to a cutting board. Scrape the ganache onto the brownies and smooth across the surface with the back of a spoon or a small offset spatula. Let the brownies sit until the ganache is set, then slice with a serrated knife into a 4-by-4 grid to make 16 brownies.
Can I . . .
Make them ahead? Yes. The brownies, stored airtight in the refrigerator, will keep for up to 4 days.
Double the recipe? Yes. Line a 33 × 23-centimetre pan, preferably metal, with foil. Double all of the ingredient quantities and proceed with the recipe as written, but use a large saucepan to melt the butter and cook the chestnuts. Note that you’ll have to extend the bake time, so watch for the given indicators.
Make them gluten-free? Yes. Replace the all-purpose flour with an equal amount of chestnut flour or your preferred gluten-free flour blend and bake as directed.
Bake this in a different pan? Yes. Bake the brownies in a foil-lined, buttered cake pan. The bake time will be about the same.
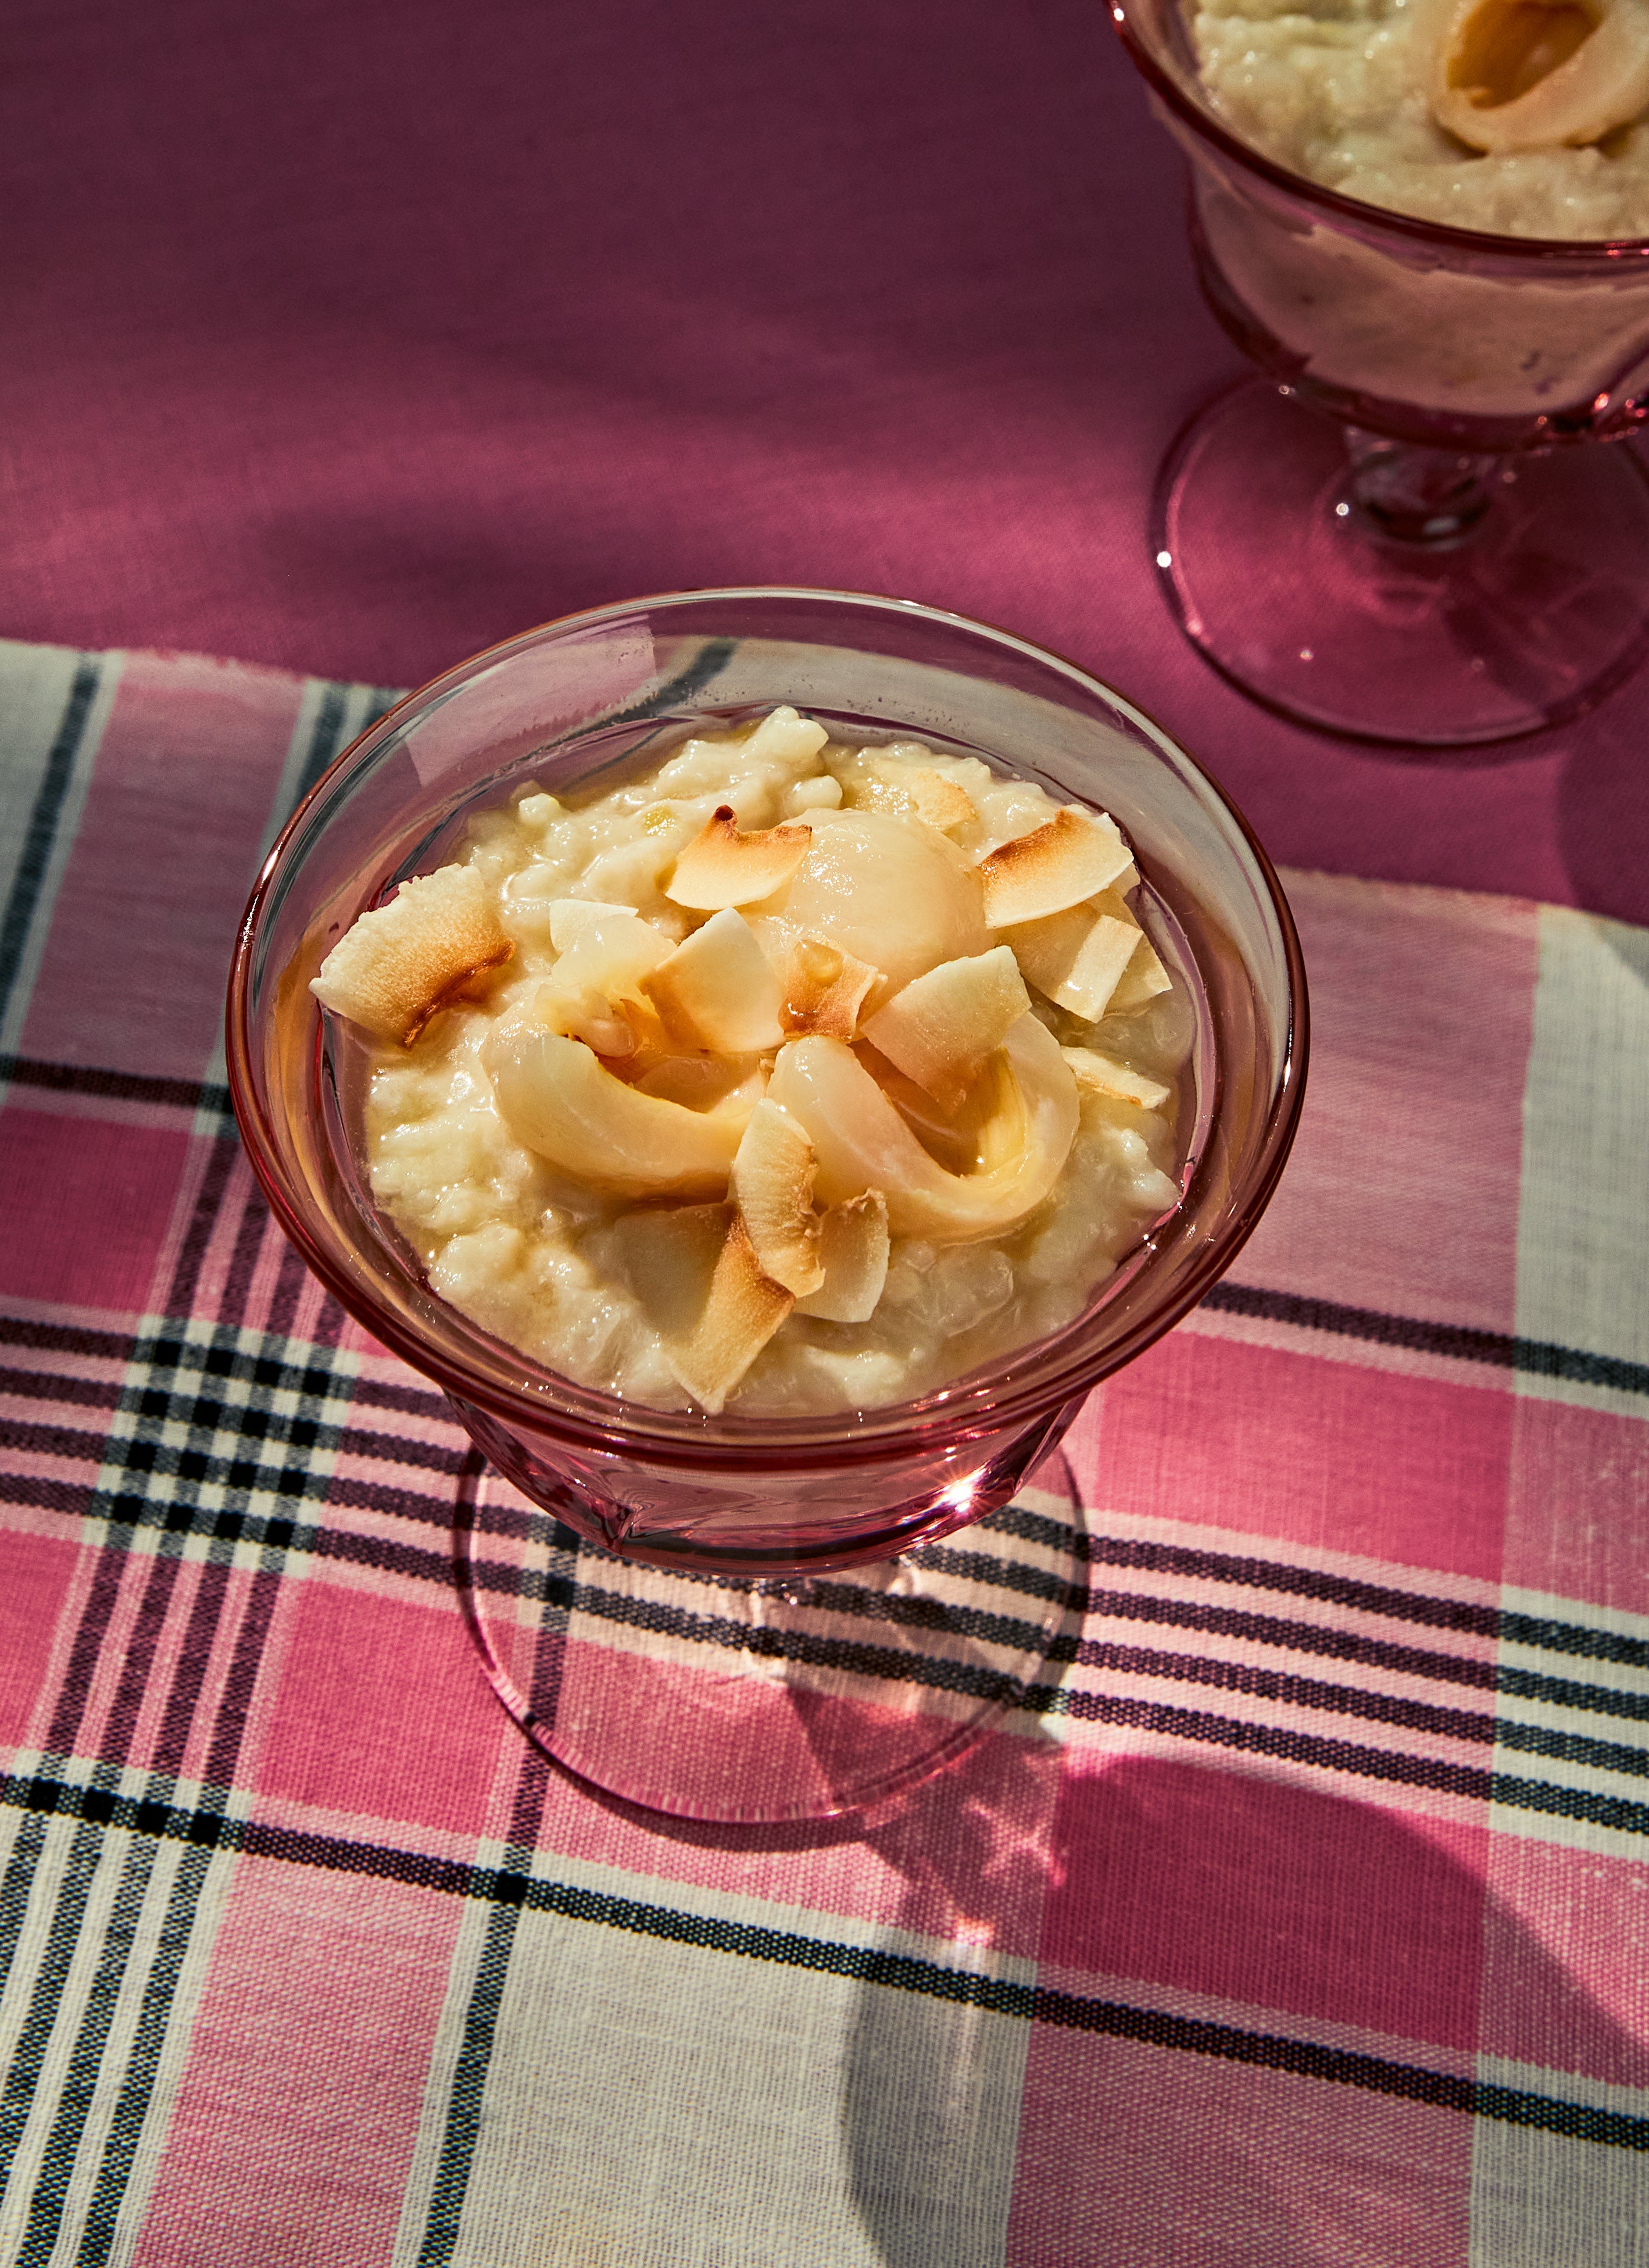
Coconut-Jasmine Rice Pudding With Lychee
Serves 6
Difficulty: 1 (Very Easy)
Dairy-free, gluten-free, vegan
Active time: 1 hour
Total time: 9 hours (includes 8 hours for chilling)
Special equipment: Blender (handheld or standard), 6 serving bowls
Ingredients:
— 2 (13.5 oz / 400ml) cans unsweetened full-fat coconut milk (not light coconut milk)
— 1 cup jasmine rice (6.8 oz / 193g)
— 2 cups unsweetened plain rice milk (16 oz / 480g)
— ½ cup sugar (3.5 oz / 100g)
— 1½ teaspoons kosher salt or ¾ teaspoon table salt
— 1 teaspoon vanilla extract
— 4 jasmine green tea bags
— 1¼ cups (10 oz / 284g) boiling water
— 1 (15 oz / 425g) can lychees in syrup
— ½ cup unsweetened toasted coconut chips (1.2 oz / 35g), for serving
Method:
1. EMULSIFY THE COCONUT MILK: Combine the cans of coconut milk in a large saucepan. If the liquid has separated from the solids, heat the coconut milk over medium heat, whisking frequently, until you have a smooth liquid, then remove the saucepan from the heat (if the coconut milk has not separated, skip this step). Use a handheld blender to blend the coconut milk directly in the saucepan on high speed for 1 minute — this is to break the fat particles into smaller pieces so the final pudding is smooth. (Alternatively, transfer the coconut milk to a standard blender and blend on high speed for about 30 seconds, then return to the saucepan.) Set aside.
2. RINSE THE RICE: Place the rice in a mesh sieve and rinse with cool water, tossing the rice gently with your hand, until the water goes from cloudy to clear. Shake to remove any excess water, then set the sieve aside.
3. MAKE THE RICE PUDDING: Add the rice milk, sugar, and salt to the saucepan and bring the mixture to a simmer over medium-high heat, stirring with a heatproof flexible spatula or wooden spoon to dissolve the sugar. Add the rice, stirring to prevent the grains from sticking together, and bring back to a simmer. Reduce the heat to maintain a gentle simmer and cook the rice, stirring frequently, until the mixture is thick and the rice is translucent and tender, 30 to 35 minutes. Remove the saucepan from the heat, then stir in the vanilla. Transfer the rice pudding to a large bowl and set aside.
4. MAKE THE TEA AND INFUSE THE RICE PUDDING: In a small heatproof bowl, steep 3 of the tea bags in the boiling water for 5 minutes, then remove the tea bags and set aside but do not discard. Stir the tea into the rice pudding (it will look liquidy but will thicken up), then submerge the 3 tea bags in the pudding, placing the strings over the side of the bowl. Cover the bowl and refrigerate until the rice pudding is cold, set, and infused with tea flavour, 8 to 12 hours.
5. INFUSE THE LYCHEES : Pour the can of lychees into a mesh sieve set over a small saucepan, letting the syrup drain into the saucepan. Slice the lychees in half lengthwise, transfer to a medium bowl, and set aside. Bring the syrup to a simmer over medium heat, then remove from the heat and add the remaining tea bag to the saucepan. Let the tea steep in the syrup for 5 minutes, then remove the tea bag and pour the syrup over the lychees.
6. SERVE: Stir the rice pudding to even out the consistency (discard the tea bags), then divide among six serving bowls. Top with the lychees and a drizzle of the jasmine-infused syrup. Sprinkle with the toasted coconut chips and serve.
Can I . . .
Make it ahead? Yes. The rice pudding will keep, covered and refrigerated, for up to 1 week. The halved lychees in the steeped syrup can be refrigerated in an airtight container for several weeks.
Halve the recipe? Yes. Halve all the quantities in the ingredient list and follow the recipe as written, but cook the rice pudding in a small saucepan. Divide among three serving glasses.
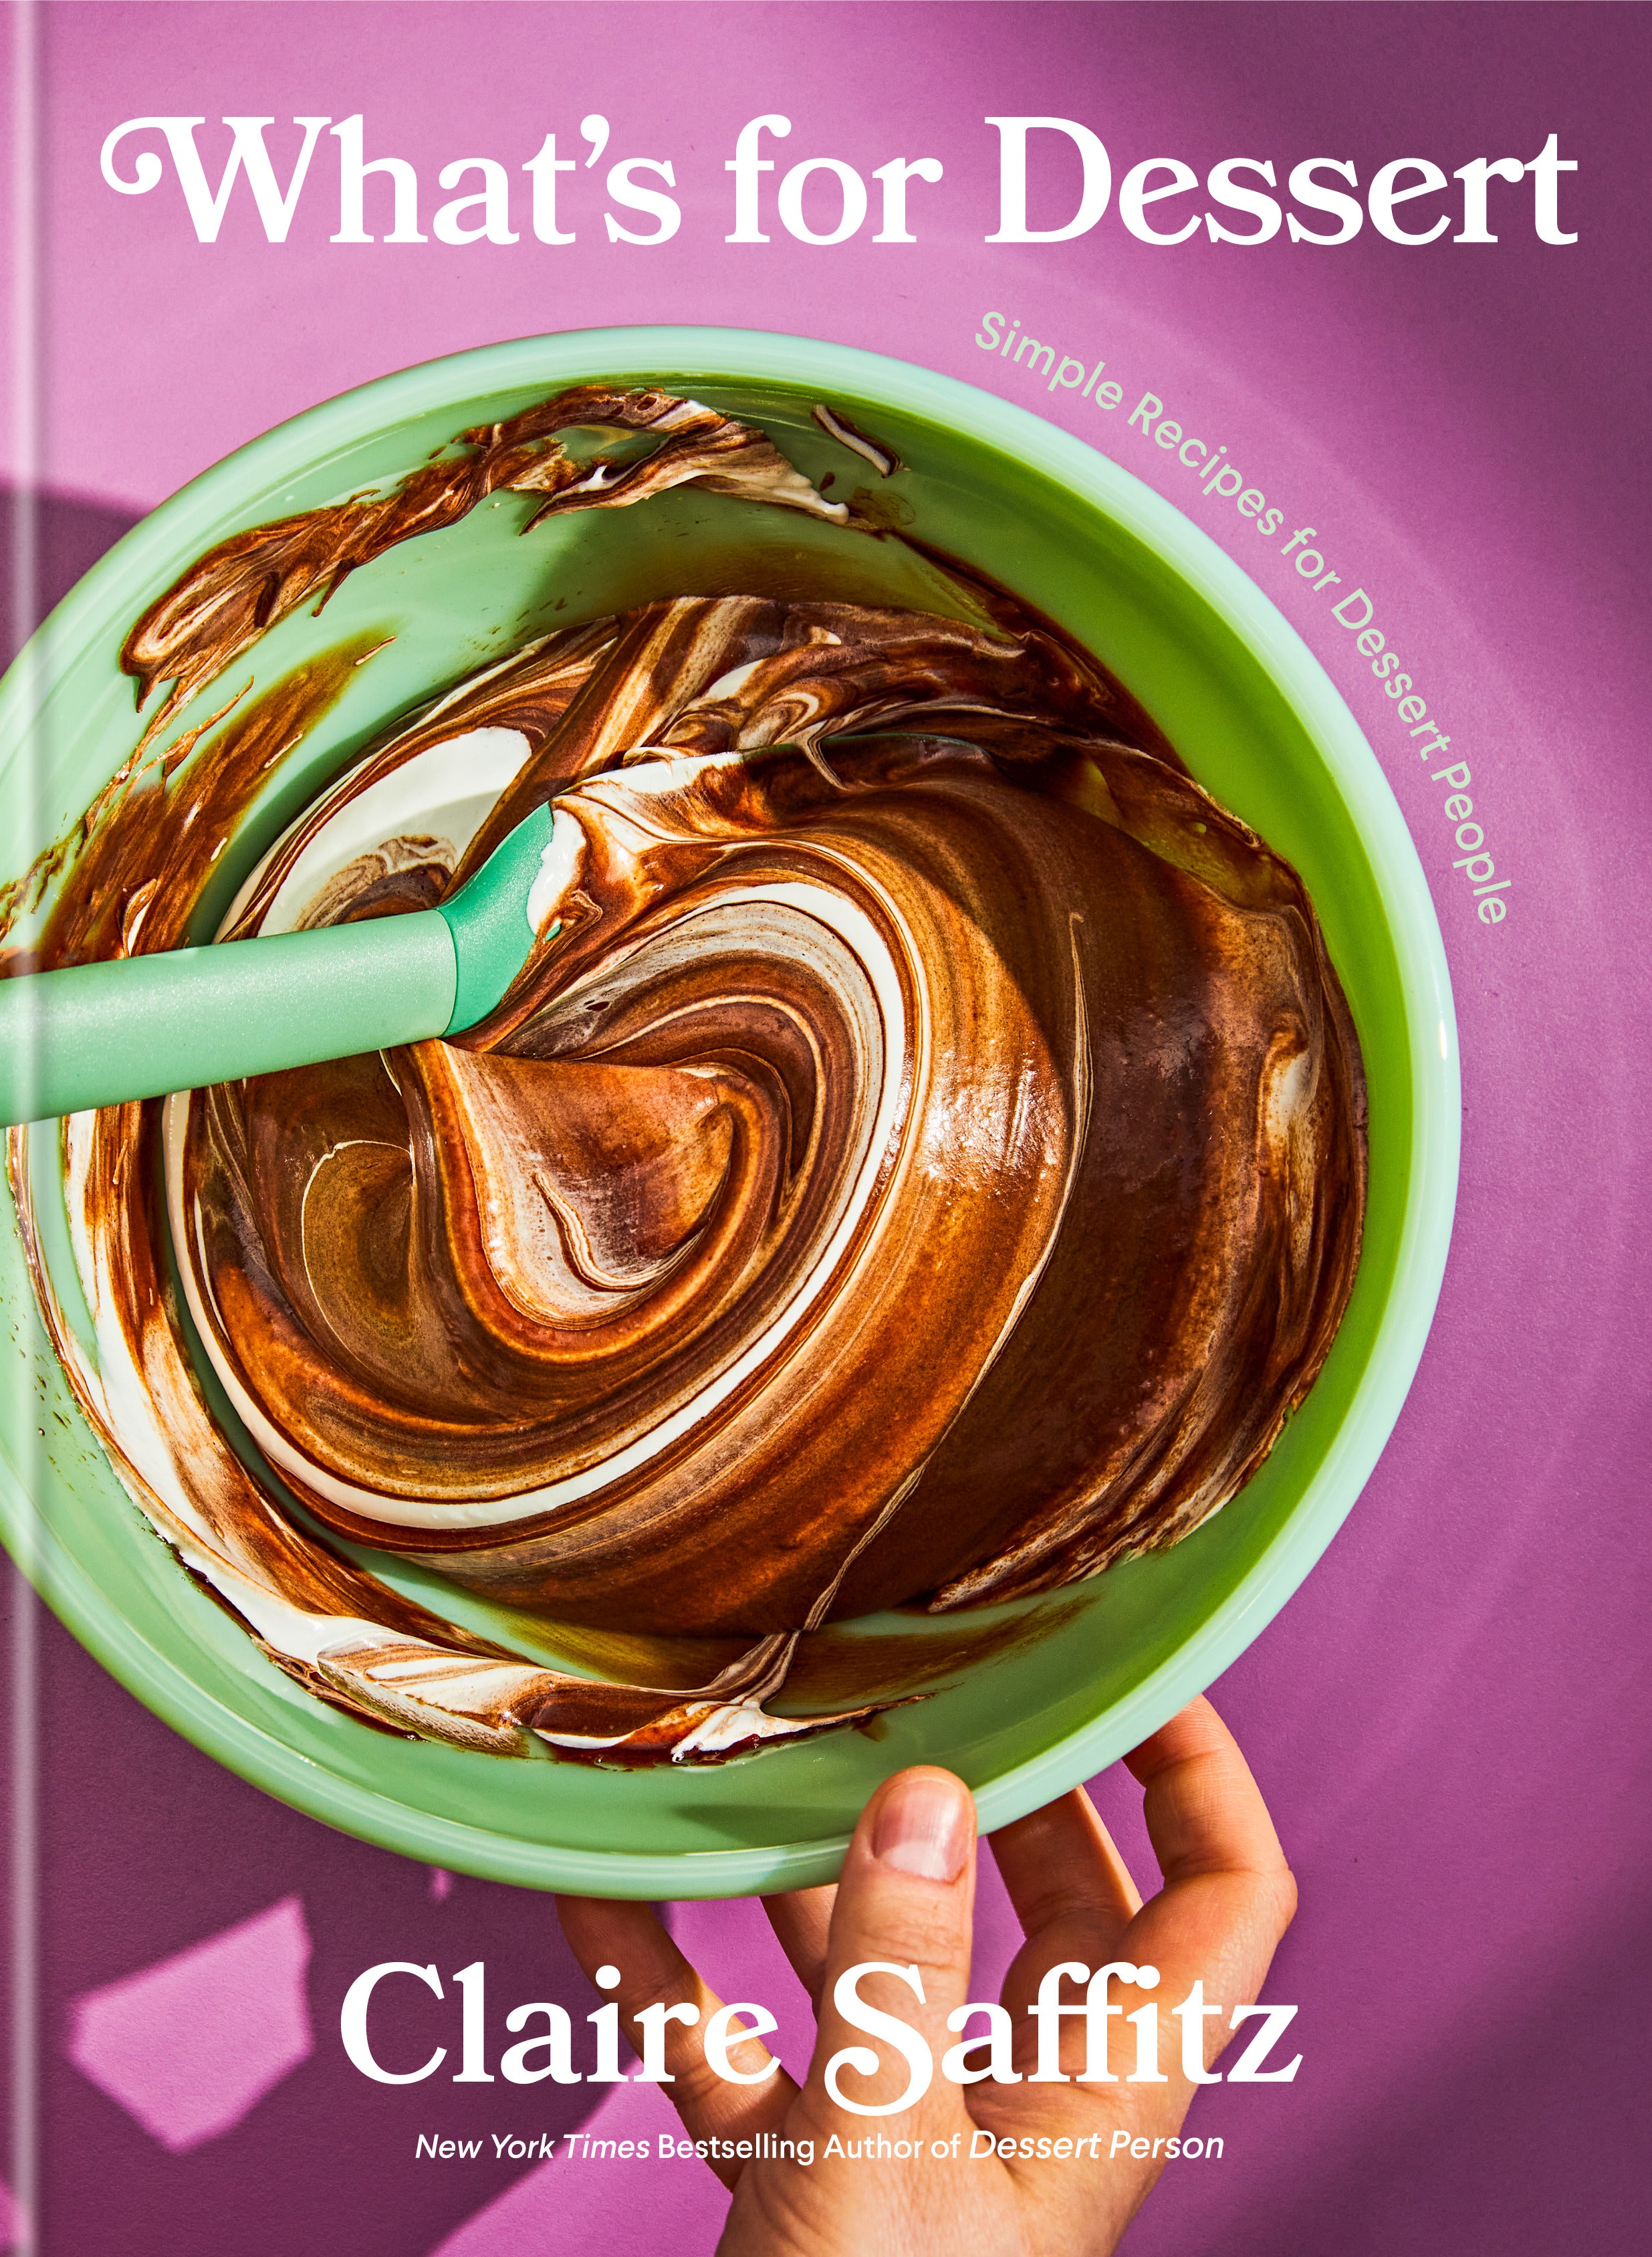
Claire Saffitz What’s for Dessert: Simple recipes for Dessert People, $, available at bookshop.org
Like what you see? How about some more R29 goodness, right here?
How Food Memoirs Became An Act Of Protest