It’s summer time again! Aside from fashion essentials and makeup, summer-inspired nail arts are taking the internet by storm. This new fruit nail art craze is unique, colorful, and perfect for the season.
Are you ready to invade the beach or just enjoy the summer heat with friends? Get right into the summer spirit with colorful and vibrant nail designs to match your fashion look. This colorful fruit nail art will surely bring out the happiness, creativity, and fashion geek in you.
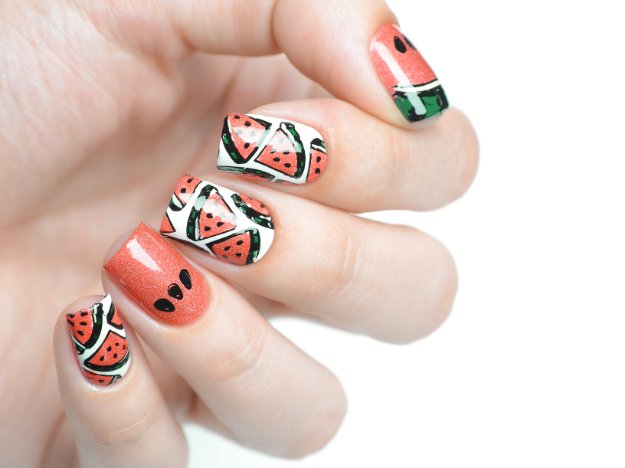
Fruit Nail Art | Watermelon Slice Tutorial Perfect For Summer
For the ultimate summer look, this fruit nail art which showcases watermelon slices is perfect! It matches any summer fashion statement and makeup to make you look colorful and vibrant this season.
What You’ll Need To Make This Watermelon Slice Fruit Nail Art:
- Natural nail base coat
- Fuschia nail polish
- Light blue nail polish
- Green nail polish
- White acrylic paint
- Black acrylic paint
- Thin brush
- Small dotting tool or toothpick
- Medium or large dotting tool
- French tip guide
Step 1: Apply Natural Nail Base Coat
Apply a natural nail base coat to help protect your nails.
Step 2: Apply Fuschia and Light Blue Nail Polish
Apply fuschia nail polish on the ring and thumb nails, then apply a light blue polish to the rest of the nails.
Step 3: Create The Watermelon Slice Print
By using a white acrylic paint and a thin brush, create the watermelon slice shapes on the light blue-colored nails. Do this by first making a smile line and then make it into a triangle-shaped watermelon slice. Draw the watermelon slices on the rest of the light blue-colored nails.
Step 4: Make Green Thin Lines At The Bottom Of The Watermelon Slices
Using a green nail polish, create a small line at the bottom of the watermelon slice. Do this to the rest of the slices.
Step 5: Make Green Thin Lines At The Bottom Of The Watermelon Slices
With the use of the fuschia nail polish, fill up the rest of the watermelon slice shapes. Make sure to leave a little stripe of white between the green and the fuschia.
Step 6: Apply Black Dots On The Watermelon
Using a black acrylic paint and a small dotting tool, create three little dots on the watermelon slices.
Step 7: On to the Thumb!
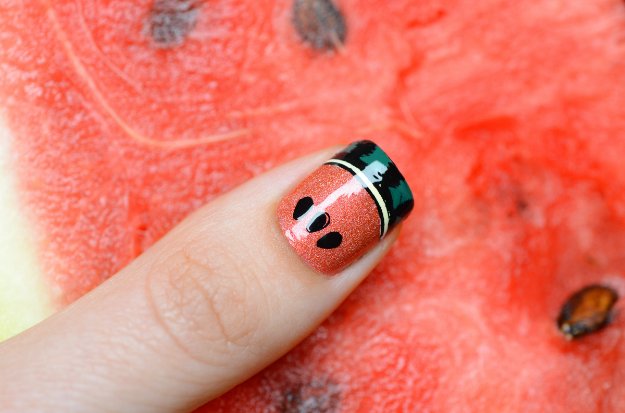
Using a french tip guide, apply a white nail polish all over the tip of your thumb nail. Carefully remove the french tip guide after.
Step 8: Apply The Green Nail Polish At The Tip Of The Nail
Apply the green nail polish on the tip of the nail. Also, make sure you leave a white stripe between the two colors.
Step 9: Create The Watermelon Seeds
Use a dotting tool to create watermelon seeds. Use a black acrylic paint to create bigger dots.
Using a thin brush, create teardrop shapes on the dots to make them look like watermelon seeds.
Step 10: Add Quick Drying Top Coat
Use a quick drying top coat to cover the design and make it look shinier.
Here it is! Your very own fruit nail art with watermelon slices!
To watch the full tutorial on how to make your own fruit nail art with watermelon slices, here’s the video from cutepolish:
This fruit nail art looks perfect with the ultimate summer fashion essentials, check this out from Makeuptutorials.
Are you going to try this summer fruit nail art? Let me know below in the comments! Stay connected with me on Facebook, Twitter, Pinterest and Instagram!